-
 @ 65912a7a:5dc638bf
2024-12-08 05:33:02
@ 65912a7a:5dc638bf
2024-12-08 05:33:02Chef's notes
This is my late partner's award winning Cajun rice & beans recipe. It's an updated take on the traditional Cajun comfort food.
Chef Darin was a classically trained chef who spent 30+ years in the kitchen perfecting his recipes, and delivering authentic Cajun and Creole food to his patrons. This is a 5-star dish that will earn the respect of the most discerning Cajun afficionado. You won't be disappointed.
I suggest making this recipe exactly as directed the first time, and then make whatever adjustments you want for future batches. Also, don't cheap out on the Andouille. No Johnsonville or Hillshire Farms. Chef Aidelle's is a good choice, as is Silva's from Whole Foods. They cost a few extra bucks, but it's absolutely worth it.
Details
- ⏲️ Prep time: 30 min
- 🍳 Cook time: 3 hours
- 🍽️ Servings: 12
Ingredients
- 16oz small red beans, dry
- 2 cups long grain white rice
- 14-16oz andouille sausage, sliced
- 8oz ham, cubed
- 1 large yellow onion, chopped
- 1 green bell pepper, chopped
- 2-3 stalks celery, chopped
- 2 tbsp garlic (12 cloves), minced
- 7 cups water
- ¼ cup olive oil
- 2 large bay leaves
- 1 tbsp parsley, dried
- 1 tsp thyme, dried
- 1 tsp Cajun seasoning
- ½ tsp cayenne pepper, dried
- ¼ tsp sage, rubbed
- 1½ tsp salt (more or less to taste)
Directions
- Soak beans in a large pot of water overnight.
- Heat oil in a large stockpot over medium heat. Cook onion, bell pepper, celery, garlic in olive oil for 3 to 4 minutes (until onion is translucent).
- Add beans, bay leaves, parsley, thyme, salt, MSG, Cajun seasoning, cayenne pepper, Sage, and water. Stir, bring to a boil, and then reduce heat to medium-low (btwn 2-3). Cover and simmer for 2½ hours.
- Remove bay leaves. Mash some of the beans. Stir Andouille and ham into beans, and simmer uncovered for an additional 30 minutes.
- Meanwhile, prepare the rice. Bring water and rice to a boil in a saucepan. Reduce heat, cover, and simmer for 20 minutes.
- Serve beans over steamed white rice.
-
@ 3bf0c63f:aefa459d
2024-12-06 20:37:26
início
"Vocês vêem? Vêem a história? Vêem alguma coisa? Me parece que estou tentando lhes contar um sonho -- fazendo uma tentativa inútil, porque nenhum relato de sonho pode transmitir a sensação de sonho, aquela mistura de absurdo, surpresa e espanto numa excitação de revolta tentando se impôr, aquela noção de ser tomado pelo incompreensível que é da própria essência dos sonhos..."
Ele ficou em silêncio por alguns instantes.
"... Não, é impossível; é impossível transmitir a sensação viva de qualquer época determinada de nossa existência -- aquela que constitui a sua verdade, o seu significado, a sua essência sutil e contundente. É impossível. Vivemos, como sonhamos -- sozinhos..."
- Livros mencionados por Olavo de Carvalho
- Antiga homepage Olavo de Carvalho
- Bitcoin explicado de um jeito correto e inteligível
- Reclamações
-
@ 148755e6:450c107f
2024-12-05 10:09:32
突然荒野に行きたくなったので行ってきたエントリーです
まずは練習。高尾山へ
Nostrは古今東西ありとあらゆるオフ会が生えており、
まるで荒野に行きたいという私の意志を完全に汲み取ったかのように「紅葉を見にいこうようオフ」がそこに生えていたので参加した。(しおんさんご主催ありがとうございました)
 前半1時間くらいの坂道がマジきつかったです。前半キツすぎて後半足痛かった。。
終始人がいっぱいいて渋谷かと思った。
前半1時間くらいの坂道がマジきつかったです。前半キツすぎて後半足痛かった。。
終始人がいっぱいいて渋谷かと思った。確かに道がかなり整備されていて、逆にコンクリート故に足が疲れたのかもしれない。隣の人は途中の急な坂道で足を滑らせてて、横で転倒事故が起きるかと思いました。
 山頂に行っても人がたくさんいて、迷子になりかけた。あそこはスクランブル交差点や。
そして山頂の先にあるもみじ台まで歩くと人がまばらで、まったりして蕎麦食べたりしながら休憩して下山。
山頂に行っても人がたくさんいて、迷子になりかけた。あそこはスクランブル交差点や。
そして山頂の先にあるもみじ台まで歩くと人がまばらで、まったりして蕎麦食べたりしながら休憩して下山。登りは暑くて汗かきましたが、山頂でまったりしてると汗も引いてきて少し冷えました。
 下山はスイスイ。16時近くで結構暗かったので、冬の間は早めの登頂・下山がおすすめですね。
登り2時間・下り1時間半で概ね見込み通りって感じでした。
高尾山は登ってると景色が変わります。ちょっと開けた場所に出て下の街が見えたり、草木があったり、階段があったり、参道があったり。。そういう意味では退屈しない2時間でした。


ビギナー山とはいえ、革靴やヒールのある靴で登ってる人がいてびっくり。ツルッと滑ることあると思いますので、スニーカーで登ることをお勧めします。
舐めプしてたとはいえめちゃくちゃキツかったおもひで。
更なる練習。小浅間山へ
さて私は荒野に行きたいワケなのですが、高尾山に荒野はありませんでした。更なる練習として小浅間山へ。
前日(か前々日)に雪が降ったようで、山に雪が残っておりました。
それでも都内の汚れてべちゃっとした感じの雪ではなく、粉砂糖がちょっと積もってるみたいな感じで綺麗だった。


登り前半の30分くらい、景色や道が変わらず、ずっと歩きっぱなしになってしまいました。時間みて休憩しながら行けばよかったなあ。
登るにつれて気温が下がっていくのか、積雪が厚くなっていく。
40分くらいは割と平坦な道が続きますが、突然山頂っぽいものが現れて、「これを登れっていうのかい...?」とビビるほどピーンと急な道が出てきました。(写真だと分かりづらいですね)

ただ、高尾山のコンクリート道に比べると足の疲れはそこまででした。雪道なので気をつけて歩くという意味では疲れましたが、春〜秋とかは快適に登れるんじゃないでしょうか。
山頂に到着するとドーンと浅間山が見えて圧巻。
風が強くて飛ばされる恐怖はありましたが、なんとか無事でいられました。あったかいお茶美味しかった〜。
なぜかギャルの看板があって、謎でした。写真はひとまずありません。


山頂が2箇所あって、それぞれで眺めを満喫していたら結構時間が経ってました。
小さい背丈くらいの木や足元にちょっとした植物があったり、自分的にはかなり理想の荒野に近かったです。(植物に対する解像度が低すぎる) 往復で2時間程度の山らしいんですが、なんやかんやと2時間半強くらいいた気がします。


荒野ビギナーは小浅間山に往け
というわけで、荒野に行きたい人はまずは小浅間山を登ると良いと思います。 また登りたい。
荒野部部長
一緒に高尾山・小浅間山に登ってくれた方、ありがとうございました! 個人的には来年の春までに秩父多摩甲斐国立公園に行き、来年の秋までに大山隠岐国立公園に行くという目標を立ててるんですが、 少々時間が空くので次どこに行こうかしらと考えているところです。
ヒントとしては、火山で、あまり高低差のないところだとビギナーの私にちょうど良さそうです。
とある情報筋によると伊豆大島が良さそうなので、次の機会に行けたらと思っています。
みんなで荒野に行こう!

-
@ ac8bb9b0:70278acc
2024-12-04 20:30:30
Chef's notes
Make Ahead: You can prepare this recipe up to one week in advance. Store it in an airtight container in the refrigerator.
To Freeze: Allow the dish to cool completely before transferring it to a freezer-safe bag. Lay the bag flat in the freezer to ensure even freezing and to save space. Thaw it in the refrigerator overnight before using it.
Details
- ⏲️ Prep time: 5
- 🍳 Cook time: 5
- 🍽️ Servings: 1
Ingredients
- ½ cup soy sauce
- 2 Tablespoons rice vinegar
- 1 Tablespoon sesame oil
- 1/4 cup + 1 Tablespoon light brown sugar
- 1 Tablespoon honey
- 3/4 teaspoon ground ginger
- 1 clove garlic , minced
- 2 teaspoons cornstarch+ 2 tsp water , mixed together to make a cornstarch slurry
- 1/4 teaspoon crushed red pepper flakes
Directions
- Make the teriyaki sauce by adding all of the sauce ingredients to a small saucepan over medium heat.
- Bring to a boil, stirring constantly, and boil for about 1 minute. The sauce should be thick enough to coat the back of the spoon.
- Serve over rice or with a stir-fry. See post above for additional ideas.
-
@ 26bb2ebe:70530958
2024-12-02 16:46:10
nostterに画像最適化機能つけたよ(サーバー編)
この記事はNostr Advent Calendar 2024 の3日目の記事です。
あまり技術的な話はないので暇つぶし程度に読んでみてください。
どうしてこうなった?
そもそも認証の改善以前にNostrあんまり人が増えてないのが一番課題だよねと思ったのが始まりでした。 Nostrに人が増えないのはオーガニック検索流入が少ないからに違いないと特に根拠もなく思ったのでNostrのまとめサイト(Toggeter)のようなものを作ろうと考えました。
ところでNostrのまとめを行うアプリ自体は鎌倉さんという方がノスリというのを作成されていました。ブログ形式のイベントにTwitterライクな短文投稿をまとめるというものでまさしくToggeterですが、そこまで活用されていません。 そこでその仕組みをありがたくそのまま転用してまとめ記事を何らかの方法で量産しつつ、一つのドメインのサイトにまとめてSEOもなんかうまいことやれば検索流入増えるんじゃねという目論みです。
ところでそのまとめサイトは静的サイトジェネレータで(SSG:Static Site Generator)でつくりたいなと思いました。いや普通に考えてSSRにしてサーバ側でNostrからデータとってきたらSEO的にもよくねって感じなんですが、SSRでサーバーでウェブソケット呼ぶのだる…レイテンシを考慮すると結構不利じゃないかなと思ったわけです。うそです。そこまで考えてなくてほとんど個人的な好みです。(多分ちゃんとキャッシュきかせればそんなにレイテンシ問題にならなさそうな気がする)。ただキャッシュとかも考慮すると結構複雑な気はする。
ということで今年の6月頃にNostrのブログ記事をSSGするサイトをためしに作りました。 去年のアドベントカレンダー記事とか乗っけてます。
全然画像最適化の話になりませんね。もうちょっとです。
SSGのブログといえばGatsby(今は下火かも)とかで作成した経験があります。Gatsbyでは画像用のプラグインが公式に用意されていて生成されたブログに表示される画像はもとの画像データから変換され、表示時のサイズに最適化されたサイズにリサイズすることができます。
それだけではなくサイトの初期表示時には画像の画質を落としてぼやけた画像を表示してその後元画像が読み込まれたらきれいな画像を表示する、みたいなことができます。インラインでデータを持っているのでHTMLの表示と同時に画像の初期表示ができたりします。(その頃はよくわかってなかったがNostrのNIP-92で定義されているblurhashとかを使っていたんでしょう多分)
とにかくSSGは初期表示の速さが良い。というのが自分の頭の中にあるわけです。SSGのブログをNostrで作るとなると当然同じことがやりたい。
しかし、Nostrの画像はただのURLです。(オプショナルで画像のメタデータを定義できるimetaタグはあるが…)
基本的にSSGの画像最適化というのはローカルに存在する画像データをビルド時に変換するという流れで行われます。もしくはリモートURLに画像が置かれる場合は画像ストレージサービスやCDN上で配信されるときに最適化されることになります。
Nostrの画像はただの外部のURLですから(2回目)、ローカルの画像を変換する方法は採用できないわけです。無理やり実行するならビルド時にURLからすべての画像を一旦ダウンロードして変換するとかも考えましたが、ただの外部URLというのはつまりは一体どういうファイルなのかダウンロードしてみるまでわからない、要するに全然信頼できないということですから、よくわからないURLをかたっぱしからダウンロードするようなことは避けたいわけですね。(極端な話100GBの画像URLとかつくって攻撃されたら破綻しますよね)
ここが結構他の中央集権的なSNSと違って辛いところなのかなと思います。X(Twitter)とかであれば画像ストレージサーバは一つなので表示される画像の形式も一つに限定されるのですが、画像のアップロードが外部頼みでただのURLなので(3回目)何が来るかわからないということですね。
サーバ側で画像形式などを制限できない(imetaも信頼できるかわからない)となるとクライアント側でなんとか対応する必要があり、Nostrはクライアント側が大変なプロトコルだなあとということに思いを馳せていましたが、いろいろ考えたり調べた結果として作るべきものは画像最適化のためのプロキシサーバであるということがわかりました。
プロキシサーバというのはここでどういう働きをするのかというと、もとの画像がおいてあるサーバとクライアントのあいだに入って、もとの画像を一旦ダウンロードして圧縮したり縮小したりしてそのあとクライアントに送ってあげるという働きをします。
プロキシがないとき
[画像置き場] -> [クライアント]プロキシがあるとき
[画像置き場] -> [プロキシ] -> [クライアント]利点としてはクライアントが実際にダウンロードするのはサイズの小さな画像になるので通信量や画像の表示スピードは改善します。が、一方でサーバを経由する分通信にかかる時間(レイテンシ)が長くなります。というわけなので、当初の目的である表示速度の改善を実現するには、画像をエッジキャッシュするなどの対応が必須となります。平たく言うと一度送った画像はプロキシで保存しておいて次に要求されたらそれをすぐ返すということです。
画像をどれくらいのサイズにするか、画質はどうするかなどはプロキシに指示してあげれば良いのでクライアント側は想定通りの画像を受け取れてハッピーということになります。嘘です。ある程度はハッピーですが、プロキシ自体がエラーを返す可能性もあるし、処理できなくてもとの画像をそのまま返す場合もあります。そんなあれこれの結果、クライアントはフォールバック処理を実装する必要がありました。(それはまた別の記事で)
一方で自分はNostrのモバイルクライアントのヘビーユーザですので、Nostrの通信量の多さも解決したい課題でした。Nostrやってるとすぐギガがなくなります。 通信量の多さのボトルネックはウェブソケットで送られるNostrのイベントの通信量というよりは投稿に添付される画像のダウンロードの方ではないかという話もTLで耳にしたため(特に裏もとらず)、いっちょ画像最適化のプロキシサーバを作ってクライアントに実装してプルリクエスト投げるかと考えました。
そこで私はまずクライアントをAmethystからnostterに乗り換えることから始めました。なぜならばAmethystよりもTypeScriptとSvelteで書かれているnostterのほうがコントリビュートしやすかったという私的な事情です。
解決したい課題
遠回りしてきましたが課題はこれ。
- Nostrの画像の表示改善
- Nostrの通信量の改善
インターフェイス(設計)
画像最適化のプロキシは実装よりもインターフェースを考えるのが大変です。ここはとても苦労しそうな気がしたので、何も考えず cloudflare Imagesのインターフェースをそのまま借用することにしました。
https://developers.cloudflare.com/images/transform-images/transform-via-url/
また何かあってもcloudflare Imageに課金して乗り換えることが可能という利点もあります。
実装
とにかく時間がないので手グセでかけるTypeScriptかJS。かつ課金しないで可用性を維持できる無料枠のサーバレス環境が使いたかったので cloudflare workers に目星をつけて調査したところ、非常に素晴らしい記事を見つけましたのでこのwasmのライブラリをTSから呼び出して使わせていただくことにしました。
自分の実装したところはURLのパースと、キャッシュAPIの呼び出しを行って、最後にこのライブラリを叩くだけです。 ほかはクライアントキャッシュ用のヘッダーを書き換えたりとか細かいことはやっていますが全く大したことはやっておらず、サーバは非常にリーズナブルにやりたいことを実装した形になりました。 大変助かりました。
実装したものがこちらです。
https://github.com/ocknamo/nostr-image-optimizer
実装後の課題
このプロキシただのパブリックAPIなのでDoS攻撃に弱いです。何回もAPIをたたかれたら無料枠をすぐに超えてしまうことが容易に想像できました。 無料枠超えても使えなくなるだけで破産はしないので安心ですが、しかし対策は考える必要があります。
WAF
WAFです。APIに対するリクエスト回数などに対する制限をIPごとにかけています。また攻撃された場合検知できれば特定のIPや地域をブラックリストに入れることも可能です。
細かいことを説明してギリギリを攻めて攻撃されても困るので細かく説明しませんが、当初は全力でDoS攻撃されても無料枠超えないくらいの感じで制限をかけていました。 しかしNostrのTLをちょっと早めに表示するとすぐにWAFに引っかかってエラーになるという状態になることもあり、結局アイコンの表示は画像最適化の対象にしない方針にするなどの影響がありました。
いろいろあって、前提が変わり、もう少し制限をゆるくしたのでアイコンの対応は今後は検討できるかもしれません。
まとめ
割と手抜きで作ったことがわかるかと思います。実装しててNostrへの貢献ではあるはずですが、Nostrのプロトコル(NIPsとか)全然関係ないことやってるなと思いました。
フロントについては来週書きます。
次回のアドベントカレンダーの記事は eyemono.moe さんによる”クライアント自作を通して得られた知見まとめ”ですね!楽しみです!
-
@ c230edd3:8ad4a712
2024-12-02 03:49:19
Chef's notes
This recipe is not my own, but it was great and easy, so I'm moving it here. Cooking as instructed serves 2, but this could easily be adjusted to include stir fry vegetables and rice, to make this a meal for 4.
Details
- ⏲️ Prep time: 15 minutes, 1-24 hours marinating
- 🍳 Cook time: 10-15 minutes
- 🍽️ Servings: 2-4
Ingredients
- 1 Venison Heart (elk would work well, too. recipe would need to be doubled)
- 1/2 Asian Pear, grated
- 2 Cloves Garlic, grated
- 1 Tbsp Ginger, grated
- 3 Tbsp Soy Sauce
- 1 Tbsp Honey
- 1 Tbsp Onion, grated
- 1 Tbsp Toasted Sesame Oil
- 1 tsp Red Pepper Flakes
- 2 Shallots, chopped
- Sesame Seeds
- Cooking Oil
Directions
- Mix all ingredients besides heart, shallots, sesame seeds and cooking oil in a medium bowl.
- Remove arteries and excess fat from heart, cut in half and rinse
- Cut into thin slices or bite size pieces
- Add to marinade, mix and cover. Allow to soak for 1-24 hours.
- Heat oil in large frying pan over med-high to high heat
- Drain excess marinade.
- Place heart in pan and sear on both sides to desired doneness. Medium rare is ideal for heart.
- Remove from pan and garnish with chopped shallots and sesame seeds. Serve with stir fry veggies and rice, if desired.
-
@ 3369d0a7:eb020757
2024-11-28 07:41:32
Chef's notes
This recipe was a staple at every thanksgiving with family and now I share it with you nostr family. Absolutely one of my favorite side dish during the holiday. The corn pudding in the photo is NOT baked, I will update it. I hate stock photos.
Details
- ⏲️ Prep time: 15-20 min
- 🍳 Cook time: 30-40 min
- 🍽️ Servings: 6-8
Ingredients
- 2 cans of creamed corn
- 2c Milk
- 1 Box of Jiffy Cornbread Mix
- 3 eggs
- 1/4-1/3c sugar
- 1/2- green bell pepper or pepper onion blend
- 1/4TBsp vanilla
- 1/2tsp Salt
- 2TBsp Butter
Directions
- Grab medium saucepan and desired baking dish at least 9x9
- Place saucepan on medium-high heat
- Add butter and sauté pepper onion blend until tender
- Combine milk, eggs, sugar and vanilla, mix well
- Lather warmed (NOT HOT) baking dish with butter
- Sprinkle half a box of Jiffy corn bread mix in the baking dish
- Add both cans of creamed corn to peppers and onions
- Pour wet ingredients into slightly cooled creamed corn mixture
- Sprinkle the other half box of jiffy mix into the baking dish
- Incorporate the wet and dry ingredients in dish so there are no dry lumps
- Let set for 10 min before placing in a 325 degree oven for 30-40 minutes, until the center is solid and the edges are golden brown.
-
@ c1e6505c:02b3157e
2024-11-28 00:02:26
Chef's notes
Leftover ground beef? Not sure what to do with it?
Here’s what I do with mine. I call it…
The Beef Panzone
It’s like an omelette, a calzone, and a quesadilla had a baby. I called it that for now, but hey, if you’ve got a better name, lemme hear it!
The beef’s already cooked and seasoned with sea salt, but feel free to spice it up however you like.
Watch the video here: https://video.nostr.build/ad4856d2704ab0626a1907f5da8fedcb776495080bbaa92f4472db402c9f689d.mp4
Details
- ⏲️ Prep time: 5
- 🍳 Cook time: 10
- 🍽️ Servings: 1-2
Ingredients
- ground beef
- 2-3 eggs
- water
- sea salt
- honey
- coconut oil
Directions
- Leftover ground beef – Chop it into small pieces. Trust me, the smaller, the better—it’ll cover more surface area in the pan.
- Two eggs, whipped with a dash of water.
- Heat up a small pan.
- Add coconut oil (around a tablespoon).
- Once the oil’s warmed up, throw in the beef.
- Stir it around.
- I like to add local honey here—sweeten it up to your taste.
- Mix it all around.
- Pour in the egg mixture, making sure it spreads out evenly. I use chopsticks here because they make it easier to maneuver.
- Use those chopsticks to poke through the egg and let the uncooked top flow to the pan. This speeds up cooking time.
- Cover it for 1–3 minutes.
- Optional step: Cut it down the middle.
- Fold it over like a calzone.
- Plate it up, either by flipping the pan over onto the plate or scooping it out.
- PANZONE!
-
@ 617f0a85:b403d1ed
2024-11-27 00:35:41
Chef's notes
I got this recipe from a friend in college. I'm not sure where she came across it, but I don't think she'd mind me posting it here.
Details
- ⏲️ Prep time: 15 min
Ingredients
- 2.5 cups unbleached all-purpose flour
- 1 tsp salt
- 2 tbsp sugar
- 12 tbsp cold unsalted butter
- 0.5 cup lard
- 0.25 cup vodka
- 0.25 cup cold water
Directions
- Process 1.5 cups flour, salt, and sugar in food processor until combined, about 2 one-second pulses. Add butter and shortening and process until homogeneous dough just starts to collect in uneven clumps, about 15 seconds (dough will resemble cottage cheese curds and there should be no uncoated flour). Scrape bowl with rubber spatula and redistribute dough evenly around processor blade. Add remaining cup flour and pulse until mixture is evenly distributed around bowl and mass of dough has been broken up, 4 to 6 quick pulses. Empty mixture into medium bowl
- Sprinkle vodka and water over mixture. With rubber spatula, use folding motion to mix, pressing down on dough until dough is slightly tacky and sticks together. Divide dough into two even balls and flatten each into 4-inch disk. Wrap each in plastic wrap and refrigerate at least 45 minutes or up to 2 days.
-
@ 9f51b59f:75e7c3a2
2024-11-26 20:04:51
Chef's notes
Use bone in or boneless short rib. This recipe also works with ox tail and pork shoulder or any kind of meat that’s ideal for braising low and slow.
Details
- ⏲️ Prep time: 30 mins
- 🍳 Cook time: 2.5-3.5 hours
- 🍽️ Servings: 6-8
Ingredients
- 3 Tablespoons natural cooking oil (I use tallow or ghee)
- 2 lbs boneless short ribs (bone-in also works)
- Salt & Pepper
- 1 small red onion, diced
- 5 garlic cloves rough chopped
- 1 bell or poblano pepper, seeded & diced
- 2 teaspoon chili powder
- 1 teaspoon ancho chili powder
- 1 tablespoon smoked paprika
- 1 tablespoon dark coco powder
- 2 teaspoon cumin
- 1 tablespoon graham masla
- 1 teaspoon dried oregano
- 3 tablespoons apple cider vinegar
- 1/2 cup tomato puree
- 3 tablespoons chipotle adobo sauce
- 3 bay leaves
- 1.5 cups stock or water
- 2 fresh limes, juiced
- Banana leaves, optional
- Avocado, sour cream, lime juice
- Shaved red cabbage with lime juice
Directions
- Preheat oven to 315 degrees F. Using a Dutch oven or braising pan, begin heating oil over high heat on the stove top.
- Season beef with salt and pepper and begin searing in the pot. Once browned on all sides set the beef aside and add the onions, garlic, and peppers to the same pan and reduce the heat.
- Season and cook the veggies 5 to 8 minutes until they start to caramelize. Add the chili pepper, paprika, coco, cumin, marsala, and dried oregano.
- Briefly toast the spices and deglaze with the vinegar and immediately add the tomato puree.
- Add the adobo sauce, broth, and using a stick blender or blender buzz the cooking liquid. (if using banana leaves remove the cooking liquid from the pan or use a new pot with lid. Line the pot with the leaves shingled over one another, return the cooking liquid over the leaves.)
- Return the beef to the pot and cover with lid or foil (fold leaves over the meat then cover).
- Place the pot in the oven and cook for 2 hours before checking, the meat should be fork tender when done.
- Mash the avocado into the sour cream and season with lime juice or hot sauce. Serve on tortillas with the crema and cabbage.
-
@ 4dc2e570:7b8126f9
2024-11-25 17:39:37
Chef's notes
Pickled pearl onions can usually be found at a middle eastern grocery store.
Details
- ⏲️ Prep time: 30 - 45 minutes
- 🍳 Cook time: 2 hours and 30 minutes
- 🍽️ Servings: 6
Ingredients
- 2.5 lbs stew meat
- 4 cloves Garlic
- 2 onions
- 6oz Bacon, chopped
- 4 Carrots (cut in 1/2 in pieces)
- 3 celery sticks (cut in 1 in pieces)
- 5 or so small gold potatoes, quartered
- 3ish tbps Flour
- 4 tbsp tomato paste
- 14 oz Guinness Beer
- 3 cups chicken stock
- 1 tsp Thyme
- 2 bay leaves
- Ghee
- Salt and pepper
Directions
- Pat dry then salt and pepper the beef. Melt 1/2 tbsp ghee over high med-high heat. Brown the beef on each side well, makes the stew tasty. This takes patience. Do some breath work while you're at it. :) Add ghee as necessary so browny bits on bottom dont burn. Put meat aside.
- In same pan, sauté onion and garlic for a few min. Throw in bacon till browned. Put in carrot and celery.
- Add 3tbsp flour (or a bit more, basically till oil is soaked up) and stir for a minute. Add tomato paste. Stir a couple more minutes.
- Add thin layer of beer and scrape yummy bits from bottom of pan. Mix everything well. Add rest of beer, broth, and herbs.
- Carmelize the pickled pearl onion on low med heat with a lil olive oil and stirring occasionally.
- Simmer covered for 2 hours. Add potatoes. Simmer for a further 30 minutes uncovered to let the sauce reduce a bit. Salt and pepper as you like. Add in some pearl onions. Enjoy.
-
@ 4dc2e570:7b8126f9
2024-11-25 17:39:08
Chef's notes
Pickled pearl onions can usually be found at a middle eastern grocery store.
Details
- ⏲️ Prep time: 30 - 45 minutes
- 🍳 Cook time: 2 hours and 30 minutes
- 🍽️ Servings: 6
Ingredients
- 2.5 lbs stew meat
- 4 cloves Garlic
- 2 onions
- 6oz Bacon, chopped
- 4 Carrots (cut in 1/2 in pieces)
- 3 celery sticks (cut in 1 in pieces)
- 5 or so small gold potatoes, quartered
- 3ish tbps Flour
- 4 tbsp tomato paste
- 14 oz Guinness Beer
- 3 cups chicken stock
- 1 tsp Thyme
- 2 bay leaves
- Ghee
- Salt and pepper
Directions
- Pat dry then salt and pepper the beef. Melt 1/2 tbsp ghee over high med-high heat. Brown the beef on each side well, makes the stew tasty. This takes patience. Do some breath work while you're at it. :) Add ghee as necessary so browny bits on bottom dont burn. Put meat aside.
- In same pan, sauté onion and garlic for a few min. Throw in bacon till browned. Put in carrot and celery.
- Add 3tbsp flour (or a bit more, basically till oil is soaked up) and stir for a minute. Add tomato paste. Stir a couple more minutes.
- Add thin layer of beer and scrape yummy bits from bottom of pan. Mix everything well. Add rest of beer, broth, and herbs.
- Carmelize the pickled pearl onion on low med heat with a lil olive oil and stirring occasionally.
- Simmer covered for 2 hours. Add potatoes. Simmer for a further 30 minutes uncovered to let the sauce reduce a bit. Salt and pepper as you like. Add in some pearl onions. Enjoy.
-
@ df478568:2a951e67
2024-11-25 02:36:34
Details
- ⏲️ Prep time: 10 minutes
- 🍳 Cook time: 30 minutes
- 🍽️ Servings: 4
Ingredients
- rice
- 2 lb. ground beef
- 8 oz. sliced mushrooms
- 1 stalk of geeen onions, chopped
- 1/4 tsp. garlic salt
- 1 10.5 oz. can of cream of mushroom soup
- 1 cup sour cream
- peas
Directions
- Cook the rice
- Brown ground beef. Remove and set aside.
- Saute mushrooms and green onions
- Cook peas(I usually use the microwave)
- Return beef to Dutch oven. Add cream of mushroom and sour cream
- Cooknon low heat for 12 minutes.
-
@ df478568:2a951e67
2024-11-25 02:36:04
Chef's notes
Easy Beef Stroganoff(Fast AF Beef Stroganaff)
This is an easy weaknight meal.
Details
- ⏲️ Prep time: 10 minutes
- 🍳 Cook time: 30 minutes
- 🍽️ Servings: 4
Ingredients
- rice
- 2 lb. ground beef
- 8 oz. sliced mushrooms
- 1 stalk of geeen onions, chopped
- 1/4 tsp. garlic salt
- 1 10.5 oz. can of cream of mushroom soup
- 1 cup sour cream
- peas
Directions
- Cook the rice
- Brown ground beef. Remove and set aside.
- Saute mushrooms and green onions
- Cook peas(I usually use the microwave)
- Return beef to Dutch oven. Add cream of mushroom and sour cream
- Cooknon low heat for 12 minutes.
-
@ de75eb1d:710c3014
2024-11-24 20:28:46
Chef's notes
Traditional Victorian recipe made better with the addition of chocolate, fills x6 one lb jars and each jar makes approximately 15 pies or one large tart.
Store in a cool dry place for 12 months for an even deeper flavour.
Unlike supermarket mincemeat, this recipe is naturally palm oil free when made using traditional ingredients (NOT Atora!), you could swap the animal fat for ghee or solid cocoa butter.
Go wild on the dried fruit, anything and everything works. This is a great area to play around and make extra special versions - like Cherry Brandied Chocolate! You can also swap or omit the nuts
Details
- ⏲️ Prep time: 30 mins
- 🍳 Cook time: 3 hours
Ingredients
- 1 lb cooking apples, cored and diced
- 1.5lb mixed dried fruit
- 1lb unrefined sugar (or honey)
- 1/2lb beef suet
- 1/2lb candied citrus peel
- 2oz chopped or flaked almonds
- 4tsp mixed spice
- 1tsp ground cinnamon
- 1/2tsp ground nutmeg
- 1/2lb dark chocolate roughly chopped
- 6tbspn brandy or rum
- zest and juice of 2 oranges & lemons
Directions
- Combine all of the ingredients except the chocolate and alcohol in a large oven proof bowl, cover and leave overnight to infuse
- Next day cover the bowl with foil and bake slowly for 3 hours in a preheated oven at 120c
- As the mincemeat cools periodically stir in the fat and when completely cold add the alcohol and chocolate chips
- Pack into sterilised jars and cover with a wax disk or 1tsp melted suet, screw the lids on tight and it will keep for 3-5 years
-
@ 21b41910:91f41a5e
2024-11-23 12:00:26
Chef's notes
Based on assorted recipes and refined over time, this round of beef tastes great as a result of the sweet and savory marinade.
Details
- ⏲️ Prep time: 5 minutes (+ 1 day)
- 🍳 Cook time: 20 minutes
Ingredients
- 2 pounds lean beef (may be labeled as London Broil)
- 1/3 cup olive oil
- 1/4 cup soy sauce
- 1/4 cup malt vinegar
- 1/4 cup lemon juice
- 1 tbsp sweetener of choice (honey, molasses, syrup, 4 packets of duck sauce, etc)
- 2 tsp old bay seasoning
- 1 tsp garlic powder
- 1 tsp sea salt
- 1/2 tsp black pepper
Directions
- Day Before: Mix all ingredients except the beef in a bowl to form a marinade. Place the cut of beef in a gallon sized Ziploc bag. Pour marinade over beef, ensure fully covered. Remove any excess air from the bag and seal. Place back in refrigerator for up to 24 hours before cooking.
- Cooking: Bring beef out of refrigerator (still in bag), and allow to rise to room temperature (about 30-40 minutes). Preheat broiler for about 15 minutes (your oven will vary). Broil for about 7-8 minutes on one side, then flip over. Continue broiling for another 7-10 minutes until temperature reads 140°F. Remove from broiler and let rest for 10 minutes before slicing thinly.
-
@ 8cd9d25d:69e9894d
2024-11-23 04:45:03
Chef's notes
Note that youtube recipe is asking for 1tablespoon of salt, which is waaaaaay too much. Recipe works fine with a teaspoon,, but your mileage may vary. Play around with it.
You don't need to prove modern packet yeasts in my experience... just yolo it.
If you want an extra crispy crust, add a second baking pan to the base of the oven as you pre-heat. Then once you've placed the dough in, to the oven, take some boiling water and pour into the second baking tray. This gives you a steam oven on a budget :)
Details
- ⏲️ Prep time: 15min (not including time for dough rises)
- 🍳 Cook time: 30mins
- 🍽️ Servings: 4-5
Ingredients
- 500 grams wholemeal spelt flour
- 1 packet baker's yeast (10grams)
- 350 ml lukewarm water
- 350 ml lukewarm water
- 1 teaspoon salt 🧂
Directions
- Preheat your oven to Preheat oven to 430°F and put a baking tray in at the same time to heat up.
- Add all ingredients to a bowl (best to use a stand mixer to save time, but you can do by hand too. Mix and knead until the dough comes together. After about 5 mins you should have a moist dough that doesn't stick to your hands... if it is a bit sticky, just add a bit more flour (different flours like differenent amounts of water)... If too dry, add a bit more water... etc.
- Remove dough from bowl & form into a ball (smooth on top, never mind if not perfectly smooth on its base). Put back in a bowl and cover with a damp cloth. Allow to rest for 30mins/1hr until dough has roughly doubled in size. Time will depend on the ambient temp where you are. In the tropics, 30mins is just fine.
- Take risen dough out of bowl and put on a floured surface and press the gas out of it... flatten the dough with your hands, and then fold each edge in until you have a rectangle (video makes this bit clear). Then roll the rectangle up into a cylinder. This gives you a nice tight dough for baking. Pinch the ends of the cylinder to seal the dough.
- Place dough onto a baking sheet/ piece of parchment paper etc... cover with damp towlel and let rise for 15/30mins
- Score the risen dough (a razer blade, clean box cutter, or serrated knife works well) , this lets steam escape from the loaf as it bakes without slpititng it in ways you wouldn't like.
- Take your hot baking tray out of the over and transfer your dough onto it. Put into oven.
- Bake at 430°F (220°C) for 15mins, then reduce oven temp to 350°F (180°C) for the final 15mins. Total bake time 30mins.
- Remove from oven and allow to cool for 20-30mins.
-
@ 65912a7a:5dc638bf
2024-11-22 21:37:16
Details
- ⏲️ Prep time: 5 min
- 🍳 Cook time: 30 min
- 🍽️ Servings: 12
Ingredients
- 12-14oz fresh cranberries
- 1⅓ cup packed brown sugar
- 1 cup raisins
- 1 orange, peeled & chopped
- 1 cup water
Directions
- Using medium sauce pan, simmer cranberries and water for 5-6 min. Cranberries will start to pop.
- Add brown sugar, raisins, and chopped orange to the berries.
- Bring to a simmer and continue to cook for 20 min. Stir often to prevent sticking. Remove from heat.
- Let set until room temp. Mixture will thicken as it cools.
- Put in a covered container and keep refrigerated. Lasts for about 2 weeks.
-
@ 9bc2d34d:d19d2948
2024-11-22 17:26:28
Chef's notes
Hot Dogs? Check. Cheese? Check. Jalapeno? Definitely (unless you can't handle the spice)
Details
- ⏲️ Prep time: 1 minute
- 🍳 Cook time: 3-5 minutes
- 🍽️ Servings: 1-4
Ingredients
- 3 Hot Dogs (Sliced Thinly or Cut into Chunks)
- Handful of Shredded Cheese Blend
- 1/4 Jalapeno minced (add less or more)
- Optional: Any toppings you like on nachos, such as tomatoes, onions, sour cream, beans, etc
Directions
- Microwave 3 hot dogs for 2-3 minutes (some hot dogs will expand)
- Top with cheese
- Microwave for 1-2 minutes (until cheese is melted)
- Sprinkle all your favorite toppings on top
- Serve
-
@ ac8bb9b0:70278acc
2024-11-21 15:14:11
Chef's notes
If you’d like to make this soup part of your rotation and want to shave off a little time for the next time around, double the recipe for the meatballs and freeze half. That way, all you’ll have to do is make the soup and add the meatballs as directed in the recipe. (They may take a few extra minutes to warm through if you add them directly from the freezer.)
The soup can be frozen for up to 3 months but wait until you reheat the soup to add the pasta. Defrost the soup in the refrigerator for 12 hours and then reheat it on the stovetop over medium heat until simmering, add the pasta, and cook until the pasta is tender.
Details
- ⏲️ Prep time: 50
- 🍳 Cook time: 30
- 🍽️ Servings: 8
Ingredients
- 1 large egg
- 3 tablespoons finely chopped fresh chives
- 2 teaspoons finely chopped fresh sage
- 2 cloves garlic, minced
- ¾ lb 85 or 90% lean ground beef
- ½ lb sweet or hot Italian sausage, removed from the casings
- ½ cup grated Parmigiano Reggiano
- ⅓ cup Italian seasoned bread crumbs
- ¼ teaspoon salt
- 2 tablespoons extra virgin olive oil
- 1 medium yellow onion, diced
- 2 large carrots, diced
- 2 stalks celery, diced
- 6 cups high-quality chicken broth
- 2 cups high-quality beef broth
- 2 cups water
- ½ cup dry white wine
- 1 bay leaf
- ½ teaspoon salt
- ¼ teaspoon white pepper (okay to use black pepper)
- 1 cup small dittalini pasta
- 4 oz fresh spinach, stems trimmed and roughly chopped (once prepped, you should have about 3 packed cups)
- Parmigiano Reggiano, for serving
Directions
- Make the meatballs: Preheat the oven to 350°F. Line a baking sheet with aluminum foil and set an oven-proof roasting rack over top. Spray the rack generously with nonstick cooking spray.
- In a large bowl, beat the egg with the chives, sage and garlic. Add the remaining meatball ingredients and mash with your hands until evenly combined. Roll the mixture into tablespoon-size balls, about 1 inch in diameter (it will make approximately 50 meatballs), and place on the prepared rack. Bake for 15 to 18 minutes, or until lightly browned and cooked through. Set aside.
- Meanwhile, start the soup. In a large soup pot or Dutch oven over medium heat, heat the olive oil. Add the onions, carrots, and celery and cook, stirring frequently, until the vegetables are softened, about 8 minutes. Add the chicken broth, beef broth, water, wine, bay leaf, salt and pepper and bring to a boil. Add the pasta and cook, uncovered, at a gentle boil until the pasta is al dente, 8 to 10 minutes (or according to package directions). Taste the soup and adjust the seasoning, if necessary. Reduce the heat to low and add the spinach and meatballs. Simmer for a few minutes, until the spinach is wilted and the meatballs are warmed through. Ladle into bowls and serve with grated Parmigiano Reggiano.
-
@ 07804b78:c375c543
2024-11-21 11:37:37
Chef's notes
- The Premium Juku Curry comes individually packaged in single-serving portions, so it's convenient for using small amounts like in this recipe.
- Use your favorite spicy level of hot bean-curd soup base/curry roux.
Details
- 🍽️ Servings: 4
Ingredients
- 1 box of “Cook Do®” (Chinese seasoning mix) for Szechuan-style Mapo Tofu
- 2 servings of Premium Juku Curry
- 500g tofu
- 400g cut tomatoes
- 200g minced meat
- 80g garlic sprouts
- 100ml water
- 1 tablespoon sesame oil
- Cooked rice, enough for the number of people
Directions
- Slice the garlic shoots diagonally into 3-4cm pieces. Cut the tofu into bite-sized pieces.
- Heat the sesame oil in a frying pan and fry the minced meat over a medium heat.
- When the meat is about 80% cooked, add the garlic shoots and continue to fry, stirring, until the meat is fully cooked.
- Turn off the heat and add the Cook Do® Sichuan-style Mapo Tofu seasoning, and mix well.
- Turn the heat back on to medium, add the cut tomatoes and water, and bring to the boil, stirring gently.
- When it comes to a boil, turn the heat down to low, add the Premium Juku Curry, and stir well to dissolve.
- Once the curry has dissolved, add the tofu and cook until the tofu is warmed through.
-
@ ac8bb9b0:70278acc
2024-11-20 16:28:11
Chef's notes
Optional: Creamy Cilantro-Basil Ranch: In a blender, blend 1/2 cup plain Greek yogurt or sour cream, 1/3 cup mayo, 2 tablespoons buttermilk, 1 cup fresh cilantro, 1/2 cup fresh basil, 1/4 cup fresh chopped chives, 2 teaspoons Worcestershire, 1 teaspoon garlic powder, 1 teaspoon onion powder, 1/4 teaspoon cayenne, and a pinch each of kosher salt and black pepper. Blend until creamy.
Details
- ⏲️ Prep time: 15
- 🍳 Cook time: 15
Ingredients
- 4 (4-6 ounce) salmon filets, cut into bite-size chunks
- 6 tablespoons extra virgin olive oil
- 1 teaspoon smoked paprika
- salt and black pepper
- 1 bunch asparagus, ends trimmed
- 1/2 cup honey
- 2-3 tablespoons hot sauce
- 1-3 teaspoons cayenne pepper
- 3/4 teaspoon chipotle chili powder
- 1/2 teaspoon garlic powder
- 1/2 teaspoon onion powder
- 3-4 cups cooked rice
- 2 avocados, diced
- 1 serrano or jalapeño, sliced
- 1/2 cup fresh cilantro, chopped
- 2 tablespoons chopped fresh dill
- 1/2 cup crumbled feta cheese
- 2 tablespoons extra virgin olive oil
- 1 tablespoon lemon juice
- 1/3 cup toasted seeds, pumpkin, sesame, sunflower, etc.
Directions
-
- Preheat the oven to 450° F.
-
- On a baking sheet, toss the salmon pieces with 3 tablespoons olive oil, paprika, salt, and pepper. Arrange in a single layer. On the other side of the pan, add the asparagus. Toss with 1 tablespoon olive oil, salt, and pepper. Roast 10-15 minutes or until the salmon is just undercooked to your liking.
-
- Meanwhile, make the hot honey. In a sauce pot, warm together the honey, hot sauce, cayenne, chili powder, onion powder, and garlic powder, plus a pinch of salt.
-
- Spoon some of the hot honey over the salmon. Switch the oven to broil and broil until lightly charred and crispy. Spoon over additional hot honey, to your taste.
-
- To make the avocado salsa. Combine avocados, serrano or jalapeño, cilantro, dill, feta cheese, extra virgin olive oil, lemon juice, and toasted seeds in a bowl and season with salt, gently tossing.
-
- Arrange the salmon and asparagus over bowls of rice. Top with salsa.
-
@ ac8bb9b0:70278acc
2024-11-20 16:25:18
Details
- ⏲️ Prep time: 25
- 🍳 Cook time: 20
- 🍽️ Servings: 6
Ingredients
- 1 tablespoon extra virgin olive oil
- 1 medium yellow onion chopped (about 1 1/2 cups)
- 2 teaspoons kosher salt, divided
- 3 tablespoons red curry paste
- 2 tablespoons grated fresh ginger (from a 3-inch piece)
- 3 medium cloves garlic, minced (about 1 tablespoon)
- 4 cups lower-sodium vegetable broth
- 1 1/2 pounds butternut squash, cut into 1 1/2-inch cubes (from 2 [20-ounce] package)
- 1 15.5-ounce can unsweetened coconut milk, well stirred
- 2 tablespoons fresh lime juice (from 1 or 2 limes)
- 6 tablespoons crushed salted peanuts
- Chopped fresh cilantro and crushed red pepper (optional), for serving
Directions
- Heat oil in a large pot over medium. Add onion and 1/2 teaspoon salt; cook, stirring often, until onion starts to brown, 6 to 7 minutes.
- Add curry paste, ginger, and garlic; cook, stirring, until fragrant, about 1 minute. Add broth and 1 teaspoon salt, scraping up browned bits from bottom of pot. Stir in squash. Bring to a simmer over medium-high. Cover and reduce heat to low; simmer until squash is tender, 12 to 15 minutes.
- Remove from heat. Stir in coconut milk, lime juice, and remaining 1/2 teaspoon salt. Use an immersion blender to process until smooth. (Or transfer to a blender, cover with lid, and remove center piece. Place a towel over opening. Process until smooth.)
- Serve sprinkled with peanuts, cilantro, and, if using, crushed red pepper.
-
@ ac8bb9b0:70278acc
2024-11-19 19:49:52
Chef's notes
This recipe is SO easy. We simply mix herbs and spices in a small dish. Add the chicken legs to a large, gallon-sized ziptop bag and add the olive oil. Seal the bag and roll those legs around for a minute to distribute the oil evenly on all the chicken. Then, open the bag, pour in the seasonings, close the bag and do the shake thing. Take a minute or so to do this and massage the chicken to really get that seasoning well distributed.
Seasoning chicken legs in a ziptop bag Set aside for a minute and preheat your oven to 425°(F) and line a baking sheet with aluminum foil. Give the foil a good spray with non-stick cooking spray. This is important as the chicken will stick without it.
Now take the chicken out of the bag and place on the foil lined sheet. Then into the oven it goes for 40 minutes.
Recipe for oven baked chicken legs After 40 minutes the chicken will be a beautiful golden color and the inside will be at least 165°(F) when checked with an instant read thermometer. In fact, it will probably be closer to 185-195°(F) which is exactly what we want!
Pro Tip: Chicken Legs are Better at 185-195°(F)! The rule of cooking chicken to a minimum internal temperature of 165°F has been well-established for quite some time. However, when it comes to darker meat portions such as chicken legs, thighs, or the entire leg quarter, exceeding this temperature is often encouraged for optimal results! When heated to around 185°F, the collagens within the meat begin to break down, contributing to the juiciness and “fall-off-the-bone” tenderness that we cherish so much in dark poultry meat.
Check out this great article by America’s Test Kitchen regarding “overcooking” chicken drumsticks and thighs.
Let Rest and Serve Carefully remove the chicken to a plate or platter and let it rest for 5 minutes before serving.
Recipe for oven baked chicken legs Can this recipe be doubled? It sure can. You can even triple or quadruple this recipe! Simply adjust the ingredients accordingly. The cook time will still be 40 minutes, just be sure to not crowd the chicken too much on the pan. Keep the legs from touching and always keep in a single layer.
Give it a kick Want to give the chicken legs a little heat? Add a ½ teaspoon of cayenne pepper and even a teaspoon of crushed red pepper flakes. You can also deepen the flavor by using smoked paprika instead of regular paprika.
Details
- ⏲️ Prep time: 10
- 🍳 Cook time: 40
- 🍽️ Servings: 2-3
Ingredients
- 6 chicken legs
- 2 tsp paprika
- 1.5 tsp kosher salt
- 1 tsp onion powder
- 1 tsp garlic powder
- 1 tsp rosemary, dried
- 1 tsp parsley flakes
- ½ tsp ground black pepper
- ½ tsp ground mustard
- 1 tbls olive oil
Directions
- Preheat oven to 425°(F)
- Pat chicken legs dry with a paper towel and trim any excess skin
- Place chicken legs in a large ziptop bag and add olive oil. Close bag and shake to coat chicken well with the oil.
- Add seasoning mix to bag, close and shake to get chicken well coated with seasoning.
- Line a baking sheet with foil and spray with non-stick cooking spray.
- Place chicken legs on baking sheet and place on middle rack of oven for 40 minutes, turning halfway.
- Chicken must have internal temperature of at least 165°(F), but 185-195°(F) is ideal for best results.
- Let rest for several minutes before serving.
-
@ af9c48b7:a3f7aaf4
2024-11-18 20:26:07
Chef's notes
This simple, easy, no bake desert will surely be the it at you next family gathering. You can keep it a secret or share it with the crowd that this is a healthy alternative to normal pie. I think everyone will be amazed at how good it really is.
Details
- ⏲️ Prep time: 30
- 🍳 Cook time: 0
- 🍽️ Servings: 8
Ingredients
- 1/3 cup of Heavy Cream- 0g sugar, 5.5g carbohydrates
- 3/4 cup of Half and Half- 6g sugar, 3g carbohydrates
- 4oz Sugar Free Cool Whip (1/2 small container) - 0g sugar, 37.5g carbohydrates
- 1.5oz box (small box) of Sugar Free Instant Chocolate Pudding- 0g sugar, 32g carbohydrates
- 1 Pecan Pie Crust- 24g sugar, 72g carbohydrates
Directions
- The total pie has 30g of sugar and 149.50g of carboydrates. So if you cut the pie into 8 equal slices, that would come to 3.75g of sugar and 18.69g carbohydrates per slice. If you decided to not eat the crust, your sugar intake would be .75 gram per slice and the carborytrates would be 9.69g per slice. Based on your objective, you could use only heavy whipping cream and no half and half to further reduce your sugar intake.
- Mix all wet ingredients and the instant pudding until thoroughly mixed and a consistent color has been achieved. The heavy whipping cream causes the mixture to thicken the more you mix it. So, I’d recommend using an electric mixer. Once you are satisfied with the color, start mixing in the whipping cream until it has a consistent “chocolate” color thorough. Once your satisfied with the color, spoon the mixture into the pie crust, smooth the top to your liking, and then refrigerate for one hour before serving.
-
@ df478568:2a951e67
2024-11-17 17:32:20
Chef's notes
This is from my wife's notebook full of recipes.
Details
- ⏲️ Prep time: 15 inutes
- 🍳 Cook time: 15 minutes
- 🍽️ Servings: 4
Ingredients
- 1/3 cup oyster sauce
- 2 teaspoons toasted sesame seed oil
- 1/3rd cup Sherry
- 1 teaspoon white sugar
- 1 teaspoon cornstarch
- 1 pound beef round steak
- 3 tablespoons avocado oil
- 1 tablespoon ground ginger
- 1 clove garlic
- 1 pound broccoli florrets
Directions
- Wisk together - Oyster Sauce - Sesame oil - Sherry - Soy Sauce - Sugar - Cornstarch in a bowl
- Heat avocado oil in a wok or large skillet over medium-high heat. Stir in ginger and garlic. let sizzle for one minute. Stir in broccoli. Set aside.
- Pour more oil into wok. tss the beef with the narinatde until the sauce forms a glaze on the beef. about 5 minutes. Return cooked broccoli to the wok. Stir in meat about 3 mionytes,
-
@ df478568:2a951e67
2024-11-17 15:27:28
Chef's notes
This is another crock pot meal I found in my wife's recipe book.
Details
- ⏲️ Prep time: 20 minutes
- 🍳 Cook time: 8-10 hours
- 🍽️ Servings: 6
Ingredients
- 2 lb. boneless sirloin tip roast
- 2 red bell peppers, chopped
- 1 small onion
- 1- 14.5 oz can of diced tomatoes, uindrained
- 2 tablespoons extra-virgin olive oil
- 2 tablespoons of italian seasoning
- salt and pepper to taste
- Parmesan cheese
- 1 lb noodles
- 1 green bell pepper, chopped
- 4 cloves of minced garlic
Directions
- Slice sirloin tip roast
- cook in a crock pot for 8-10 hours
- serve with noodles and top with Parmesean Cheese
-
@ df478568:2a951e67
2024-11-17 15:12:50
Chef's notes
This is another crock pot meal I found in my wife's recipe book.
Details
- ⏲️ Prep time: 20 minutes
- 🍳 Cook time: 8-10 hours
- 🍽️ Servings: 6
Ingredients
- 2 lb. boneless sirloin tip roast
- 2 red bell peppers, chopped
- 1 small onion
- 1- 14.5 oz can of diced tomatoes, uindrained
- 2 tablespoons extra-virgin olive oil
- 2 tablespoons of italian seasoning
- salt and pepper to taste
- Parmesan cheese
- 1 lb noodles
- 1 green bell pepper, chopped
Directions
- Slice sirloin tip roast
- cook in a crock pot for 8-10 hours
- serve with noodles and top with Parmesean Cheese
-
@ df478568:2a951e67
2024-11-17 14:51:44
Chef's notes
This is a delicious meal that is easy to make and tastes delicious.
Details
- ⏲️ Prep time: 10 minutes
- 🍳 Cook time: 20 minutes
- 🍽️ Servings: 6
Ingredients
- 2 LB of marinated Carne Asada
- onion
- corn tortillas
- cilantro
- salsa
- guacamole
- sour cream
- salt
- pepper
- spanish rice
- beans
Directions
- BBQ carne asad for about 25 minutes or until meat reaches a temprature of 150 degrees
-
@ df478568:2a951e67
2024-11-17 14:43:49
Chef's notes
This is in a recipe book my wife made, but I modified it for an InstantPot
Details
- ⏲️ Prep time: 5 minutes
- 🍳 Cook time: 1 hour 10 minutes
- 🍽️ Servings: 6
Ingredients
- 1 lb. boneless skinless chicken breasts
- 1 small diced onion or cup of frozen onions
- 1 medium sized bell pepper
- 15 oz. can of diced tomateos with green chilies, undrained
- 1 can of corn
- 1 15oz. can black beans
- 1 tablespoon chili powder
- 1 tablespoon salt
- 1 tsp ground cumin
- 1 tsp garlic
- 4 cups of chicken broth(not needed until day of cooking)
- Tortilla chips
- toppings like salsa, sour cream, avocado, etc.
Directions
- Add all ingredients into an instantpot
- Pressure cook for 1 hour
- Slow release Instant Pot for 10 minutes
- Serve
-
@ 1cb14ab3:95d52462
2024-11-17 00:57:41
Chef's notes
I have been making this every Thanksgiving since I first tried it. One of my all time favorites. You can fry the shallots and refrigerate the night before to save time.
Recipe is credit of The Pioneer Woman -- Go show some love below ⬇️ https://www.thepioneerwoman.com/food-cooking/recipes/a80624/thanksgiving-dinner-green-bean-casserole/
Details
- ⏲️ Prep time: 35 min
- 🍳 Cook time: 1 hr 30 min
- 🍽️ Servings: 10
Ingredients
- FOR THE FRIED SHALLOTS
- 1/3 c. all-purpose flour
- 1/2 tsp. cayenne
- 1/2 tsp. garlic powder
- 1/4 tsp. kosher salt
- 1/4 tsp. black pepper
- 4 large shallots, peeled and thinly sliced into rings
- frying oil
- FOR THE GREEN BEANS AND GRAVY
- 2 1/2 lb. fresh green beans, trimmed and halved (use a little less if you like gravy to beans ratio)
- 8 oz. bacon
- 6 tbsp. unsalted butter, divided
- 16 oz. sliced button mushrooms (for more mushroom flavor, use cremini variety)
- 1/3 c. finely chopped shallots
- 3 cloves (large) garlic, minced
- 1/2 c. all-purpose flour
- 1 c. low sodium chicken stock
- 2 c. half-and-half
- 2 tbsp. soy sauce
- 1 tbsp. Worcestershire sauce
- 2/3 c. grated parmesan cheese
- 2 tsp. chopped fresh rosemary
- 2 tsp. chopped fresh thyme
- Kosher salt and freshly ground black pepper, to taste
Directions
- FOR THE FRIED SHALLOTS
- In a medium bowl that has a lid, whisk together flour, cayenne, garlic powder, salt, and black pepper. Add sliced shallots. Place lid tightly on bowl and shake the bowl a few times to evenly coat shallots with flour mixture.
- Pour canola oil into a medium saucepan to a 1-inch depth and place over medium-high heat. Heat to 325°F, using a deep-frying thermometer. Fry shallots in batches until golden brown and lightly crispy. Take care to not let them get too dark, as they will also bake for a bit in the oven on top of the casserole. This should take about 3–5 minutes per batch. Transfer to a paper towel lined baking sheet. Sprinkle lightly with kosher salt and set aside.
- FOR THE GREEN BEANS AND GRAVY
- Preheat oven to 375° F.
- Bring a large pot of salted water to a boil and add green beans. Cook beans for 2–3 minutes, until bright green in color and tender crisp. Drain beans and pour into a large bowl of ice water to stop from cooking. Drain again and set aside.
- In an extra large skillet with tall sides, over medium to medium-high heat, fry bacon until chewy-crisp. Transfer bacon from skillet to a paper towel lined plate to drain and cool. Once bacon has cooled, roughly chop and set aside.
- Discard all but 2 tablespoons of the bacon fat from the skillet. Return skillet to stove top over medium heat. Add 2 tablespoons of the butter to the skillet. Once butter is melted, add the mushrooms and stir to incorporate. Cook, stirring regularly, until mushrooms are softened. Add chopped shallots and garlic, stirring to incorporate. Cook for another 2–3 minutes, until garlic is fragrant.
- Now slide everything in the skillet to one side. Add remaining 4 tablespoons of butter to other side of skillet. When the butter is melted, sprinkle the flour over the butter, whisking all the while. A flat whisk works awesome here. Draw in as much liquid as you can, into the flour. The mixture will be very thick. Let it cook for one minute, until slightly browned and fragrant. Slowly whisk in chicken stock until flour mixture is smooth. Then whisk in the half and half. Now bring the entire contents of the skillet together, scraping the bottom of the skillet, and folding to incorporate. Turn heat up to medium-high and cook until thickened and bubbly, about 4–5 minutes, stirring periodically.
- Remove skillet from heat. Stir in soy sauce and Worcestershire sauce. Then sprinkle Parmesan, rosemary, and thyme over the top and stir to combine. Now is the time to taste test and add more salt and pepper, if desired. I usually add about 1/2 teaspoon of salt and 1/4 teaspoon of black pepper at this point. Fold in blanched green beans. Transfer mixture to a baking dish and place in oven to bake for 30 minutes. Remove casserole from oven and arrange fried shallots and chopped bacon over the top, leaving green beans exposed around the perimeter of the dish. Place in oven and bake for another 5 to 10 minutes, or until edges of casserole are bubbling and the top is golden. Remove from oven and let rest for a few minutes before serving.
-
@ 1cb14ab3:95d52462
2024-11-17 00:38:07
Details
- ⏲️ Prep time: 20 min
- 🍳 Cook time: 20 min
- 🍽️ Servings: 4
Ingredients
- 1 pound shrimp
- 1 teaspoon granualted sugar
- ½ cup all-purpose flour
- ½ cup panko breadcrumbs
- 1 teaspoon salt
- ½ teaspoon black pepper
- ¼ teaspoon garlic powder
- ¼ teaspoon onion powder
- ¼ teaspoon dried basil
- 1 egg
- 1 cup milk
- 4 – 5 teaspoon chili garlic sauce
- 1 teaspoon rice vinegar
- ½ cup mayonnaise
Directions
-
- Make the sauce: Mix mayonnaise, chili garlic sauce, sugar, and rice vinegar in a bowl. Refrigerate.
-
- Prepare for frying: a) Combine beaten egg and milk in one bowl. b) Mix flour, panko, and seasonings in another bowl.
-
- Bread the shrimp: a) Coat each shrimp in flour mixture. b) Dip in egg mixture. c) Coat again in flour mixture. d) Arrange on a plate and refrigerate for 20 minutes.
-
- Fry the shrimp: a) Heat oil to 350F in a dutch oven. b) Fry shrimp for 2-3 minutes until golden. c) Drain on wire rack or paper towels.
-
- Serve: a) Coat fried shrimp with ¼ cup sauce. b) Serve with remaining sauce on the side.
-
@ 19f9afb8:ce50e4d3
2024-11-15 22:05:01
Chef's notes
Make sure you watch your roux closely. It can go from perfect to burnt in a moment. Top with green onion tops. Sprinkle a very small amount of file over top. Andouille sausage is traditional but kielbasa is also a good substitute.
Details
- ⏲️ Prep time: 30 minutes for vegetable prep + ~1 hour for boiling chicken
- 🍳 Cook time: ~2 hours
- 🍽️ Servings: 8-10
Ingredients
- 1 large onion
- 1 large bell pepper
- 2 medium stalks celery
- 6-8 cloves garlic
- ~3 lbs. bone-in, skin-on chicken; remove skin and set aside to render
- ~1.5 lbs andouille sausage, browned
- ~1/2 lb. tasso, optional
- 2 green onions, chopped and separated
- 2 cups okra, cut (frozen or fresh, not canned)
- ~1 cup oil (rendered from chicken skins & sausage)
- ~1 cup flour
- 1-2 bay leaves
Directions
- Chop all vegetables and set aside. Render the fats from your chicken skins and sausages.
- Combine your flour and rendered fats in a cast iron skillet and stir continually over medium –low heat until your roux is chocolate brown. Stir in about 1/4 tsp of flour at this stage and cook until it stops “fizzing”. (This is simply to add to the thickening power of the roux.)
- While you are cooking your roux, boil your chicken until cooked through, remove from heat and broth, and set aside to cool for deboning .
- Add your vegetables, roux, deboned chicken, sausage, hot sauce, Worcestershire, and spices/seasonings to your broth. Optional: sauté your vegetables, except okra, before adding to broth. (Only add the bottom portions of the green onion here, reserve the green tops for garnish.)
- Cook until the okra is soft and no longer slimy, about 2 hours, at a low boil. (med-high heat)
- Optional: reduce to a simmer about 10 minutes before finished and drop a few eggs to poach in the stew before serving. Do not stir.
- Serve over rice.
-
@ 44dc1c2d:31c74f0b
2024-11-15 21:31:32
Chef's notes
So if you want a more sweet stew, add some dried apricots.
Details
- ⏲️ Prep time: 15 ish min
- 🍳 Cook time: 1 Hour ish
- 🍽️ Servings: 4 to 6
Ingredients
- 1/4 cup olive oil
- 1 large onion, grated
- 2 tablespoons finely minced garlic
- 1 teaspoon chili powder
- 1 teaspoon ground cumin
- 1 cinnamon stick or 1/2 teaspoon ground cinnamon
- Salt and pepper, to taste
- 3 pounds boneless lamb shoulder, cut into 1 1/2-inch pieces
- 2 1/2 cups defatted chicken broth
- 1 dried ancho chili, stem and seeds removed
- 4 carrots, peeled, halved lengthwise and cut into 1-inch pieces
- Zest of 1 orange, in wide strips
- 2 cups cubed (1 inch) butternut squash
- 2 roasted red bell peppers , cut into 1-inch pieces
- 2 tablespoons chopped fresh cilantro leaves for garnish
Directions
- Combine the oil, onion, garlic, chili powder, cumin, cinnamon, salt, and pepper in a large, heavy pot. Stir well, then add the meat. Toss the meat with the spice mixture to coat it well.
- Add the broth, ancho chili, carrots, orange zest, and butternut squash. Bring to a boil over high heat. Then reduce the heat and simmer gently, partially covered, over medium heat for 30 minutes. Add the roasted peppers; cook, partially covered, until the lamb and vegetables are tender, about 30 minutes more. Remove and discard the chili and orange zest. Sprinkle with cilantro and serve immediately.
-
@ ab54780c:0884884e
2024-11-15 04:30:05
Chef's notes
Makes approximately 1 US quart (~1L). Double the recipe to fill a 2-quart pitcher and to avoid using only half an onion and half of a lemon. Keeps well when sealed and refrigerated for up to a week. And yes: fresh ground spices makes a difference.
Details
- ⏲️ Prep time: ~25 min
- 🍽️ Servings: 6-10
Ingredients
- 2 Jalapeño peppers
- 1/2 Lemon, juice of
- 2 cans (10 oz.) Ro-Tel Original Diced Tomatoes & Green Chiles (Mild)
- 2 cans (14.5 oz.) Whole Peeled Tomatoes
- 1 bunch fresh Cilantro
- 1/2 Red Onion
- 2 Fresh Tomatoes
- 1/2 tablespoon Black Peppercorns
- 1/2 tablespoon Salt
- 1 teaspoon Garlic Salt
Directions
- Gather required tools: Spice grinder or mortar & pestle, Knife, Cutting board, Food Processor (2+ quart size), Citrus reamer (optional)
- Open canned ingredients and strain off excess water
- Grind cumin seeds to a powder and black peppercorns to medium to fine coarseness (as desired) in spice grinder or mortar & pestle
- Rinse with fresh water and prepare all fresh ingredients, cutting them into halves or quarters as necessary to size them for comfortable loading into your food processor. It’s handy to pre-squeeze the lemon into a small glass where it is easier and safer to remove ejected seeds rather than digging them out of a loaded food processor with your finger (cook safe!). Remove jalapeño stems, but leave seeds in for the right heat level.
- In the food processor blend all ingredients except the fresh tomatoes
- Once a well-blended consistency is achieved, add fresh tomatoes and pulse/chop several times to desired level of chunkiness.
-
@ ac8bb9b0:70278acc
2024-11-12 19:55:33
Details
- ⏲️ Prep time: 10
- 🍳 Cook time: 45
- 🍽️ Servings: 16
Ingredients
- 1/4 cup light brown sugar
- 1/4 cup granulated sugar
- 1 tablespoon ground cinnamon
- 1 teaspoon salt
- 1 pound unsalted pecans halves
- 1 egg white
- 1/2 teaspoon vanilla extract
- 1 teaspoon water
Directions
- Preheat oven to 300 degrees F. Line a large baking sheet with parchment paper and set aside.
- In a bowl, add sugars, cinnamon, and salt. Whisk until combined. Set aside.
- In a large bowl, whisk the egg white, vanilla, and water together until frothy. Add the pecans and gently toss until the pecans are well coated. Add the sugar and cinnamon mixture and toss until pecans are covered.
- Spread the pecans out in a single layer on prepared baking sheet. Bake for about 30-45 minutes, stirring every 15 minutes.
- Remove from the oven and let the pecans cool on the baking sheet. When completely cool, store in an airtight container for up to 1 month.
-
@ 9349d012:d3e98946
2024-11-05 00:42:37
Chef's notes
2 cups pureed pumpkin 2 cups white sugar 3 eggs, beaten 1/2 cup olive oil 1 tablespoon cinnamon 1 1/2 teaspoon baking powder 1 teaspoon baking soda 1/2 teaspoon salt 2 1/4 cups flour 1/4 cup chopped pecans
Preheat oven to 350 degrees Fahrenheit. Coat a bread pan with olive oil. Mix all ingredients minus nuts, leaving the flour for last, and adding it in 2 parts. Stir until combined. Pour the batter into the bread pan and sprinkle chopped nuts down the middle of the batter, lenghtwise. Bake for an hour and ten minutes or until a knife insert in the middle of the pan comes out clean. Allow bread to cool in the pan for five mintes, then use knife to loosen the edges of the loaf and pop out of the pan. Rest on a rack or plate until cool enough to slice. Spread bread slices with Plugra butter and serve.
https://cookeatloveshare.com/pumpkin-bread/
Details
- ⏲️ Prep time: 30 minutes
- 🍳 Cook time: 1 hour and ten minutes
- 🍽️ Servings: 6
Ingredients
- See Chef's Notes
Directions
- See Chef's Notes
-
@ 18bdb66e:82eb5e5d
2024-11-04 23:38:03
Chef's notes
This recipe needs to sit in the refrigerator at least one hour, or overnight prior to baking. Link sausage may be used but casing must be removed prior to frying.
Details
- ⏲️ Prep time: 20 minutes
- 🍳 Cook time: 1 hour
- 🍽️ Servings: 4-6
Ingredients
- 1 lb breakfast sausage
- 1 large onion, chopped
- 1 green bell pepper
- Cooking spray
- 4 cups dehydrated/dried bread cubes
- 6 large eggs
- 1 1/2 cups milk
- 1/4 tsp salt (optional)
- 1/4 tsp black pepper
- 1 cup shredded Cheddar cheese
Directions
- Spray 13x9 baking dish with cooking spray, like PAM.
- Crumble sausage into a skillet, fry breaking up pieces
- Add onion to the sausage
- Chop bell pepper, add to sausage and onion, fry until tender
- Remove from heat, drain if needed, set aside.
- Spread bread cubes on bottom of baking dish
- Spoon sausage mixture over bread
- Blend eggs, milk, salt, and pepper in a bowl or large measuring cup.
- Pour egg mixture over sausage and bread.
- Cover and place in refrigerator.
- Refrigerate at least one hour or overnight.
- Preheat oven to 375F.
- Place casserole in oven, bake 55 minutes
- Top with cheese and bake 5 minutes longer.
- Let rest 10 minutes before cutting.
-
@ 526e9d4c:2ecfb055
2024-11-04 04:22:33
Chef's notes
最好的是用慢炖锅炖一个晚上. Best if cooked in a slow cooker overnight.
Details
- ⏲️ Prep time: 10 minutes
- 🍳 Cook time: 8 hours
Ingredients
- 金耳一块 // 1 piece of golden tremella
- 银耳2片 // 2 pieces of silver ear fungus
- 红枣10颗 // 10 red dates
- 枸杞7-8粒 // 7-8 goji berries
- 桃胶20颗 // 20 peach gum pieces
- 黄冰糖3块 // 3 blocks of yellow rock sugar
Directions
- 把银耳和桃胶用水清洗并用水泡发20分钟。 Wash the silver ear fungus and peach gum with water and soak them for 20 minutes.
- 水煮沸放入3块冰糖,溶解后把银耳和红枣倒入沸水中。 Bring the water to a boil and add 3 blocks of rock sugar. After it dissolves, add the silver ear fungus and red dates to the boiling water.
- 5分钟后加入金耳和桃胶煮30-40分钟(中途可加水稀释。 After 5 minutes, add the golden tremella and peach gum, and cook for 30-40 minutes (you can add water to dilute if needed)
- 煮开后,放5分钟即可使用,如果觉得不是很甜,可以再放一点冰糖(根绝个人口味) After boiling, let it sit for 5 minutes before serving. If you find it's not sweet enough, you can add a bit more rock sugar (according to personal taste)
-
@ 526e9d4c:2ecfb055
2024-11-04 04:13:46
Ingredients
- 金耳一块 // 1 piece of golden tremella
- 银耳2片 // 2 pieces of silver ear fungus
- 红枣10颗 // 10 red dates
- 枸杞7-8粒 // 7-8 goji berries
- 桃胶20颗 // 20 peach gum pieces
- 黄冰糖3块 // 3 blocks of yellow rock sugar
Directions
- 煮开后,放5分钟即可使用,如果觉得不是很甜,可以再放一点冰糖(根绝个人口味)
-
@ 5469030c:61ca3e1e
2024-11-03 22:03:47
Chef's notes
Make sure to prep your ingredients, before boiling the pasta.
A little Tajín seasoning per serving is also great for some extra flavor. 🌶
Details
- ⏲️ Prep time: 21
- 🍳 Cook time: 21
- 🍽️ Servings: 5
Ingredients
- • 12oz Tricolor Penne Pasta ❤️💛💚
- • 3 cups rotisserie chicken, shredded🍗
- • 4 cups chopped celery🥬
- • 1/2 cup chopped red bell pepper 🌶
- • 1/2 cup chopped green bell pepper 🫑
- • 6 slices turkey bacon, cooked and crumbled. 🦃
- • 4 tbsp avocado mayo 🥑
- • 3 tablespoons olive oil 🫒
- Sea salt & Black Pepper to taste. 🧂
Directions
- • Add 9 cups of water to a medium to large pot to boil for 15 mins over medium high heat
- Preheat oven to 375°F (190°C) then add turkey bacon on lightly coated baking sheet with a little olive oil to prevent the bacon from sticking. Bake for 15 mins.
- • In a large bowl, combine the pasta shredded chicken, chopped celery, red and green peppers, crumbled turkey bacon, and avocado mayo.
- • Drizzle 3 table spoons olive oil and stir.
- • Chill in the refrigerator for at least 30 minutes before serving
-
@ 5469030c:61ca3e1e
2024-11-03 21:59:54
Chef's notes
Make sure to prep your ingredients, before boiling the pasta.
A little Tajín seasoning per serving is also great for some extra flavor. 🌶
Details
- ⏲️ Prep time: 21
- 🍳 Cook time: 21
- 🍽️ Servings: 5
Ingredients
- • 12oz Tricolor Penne Pasta ❤️💛💚
- • 3 cups rotisserie chicken, shredded🍗
- • 4 cups chopped celery🥬
- • 1/2 cup chopped red bell pepper 🌶
- • 1/2 cup chopped green bell pepper 🫑
- • 6 slices turkey bacon, cooked and crumbled. 🦃
- • 4 tbsp avocado mayo 🥑
- • 3 tablespoons olive oil 🫒
- Sea salt & Black Pepper to taste. 🧂
Directions
- • Add 9 cups of water to a medium to large pot to boil for 15 mins over medium high heat
- Preheat oven to 375°F (190°C) then add turkey bacon on lightly coated baking sheet with a little olive oil to prevent the bacon from sticking. Bake for 15 mins.
- • In a large bowl, combine the pasta shredded chicken, chopped celery, red and green peppers, crumbled turkey bacon, and avocado mayo.
- • Drizzle 3 table spoons olive oil and stir.
- • Chill in the refrigerator for at least 30 minutes before serving
-
@ fd208ee8:0fd927c1
2024-10-31 11:03:08
Chef's notes
I got the recipe from the byanjushka website. She includes a lot more information on there, and lots of pictures and instructions. But it's all in German, so here's my quickie, English version. I've doubled the amounts, as I first baked this for the #PurpleKonnektiv meetup, and I knew I'd have some hungry guests.
The cookies are vegan, but they're mostly just peanut, so it's sort of irrelevant. Just make sure you get the really high-quality peanut butter that is 100% peanut. You can usually identify it by the fact that the oil separates from the base, a bit. Everything else is probably with hardened palm oil, or something.
Details
- ⏲️ Prep time: 15 min
- 🍳 Cook time: 10 min
- 🍽️ Servings: 30 cookies
Ingredients
- 500 g peanut butter, normal or crunchy
- 300 g brown (or raw) sugar
- 160 ml plant-based milk (or cows' milk, if you don't care about vegan)
- 1 pkg vanilla sugar (bourbon is nice) or 1 tsp vanilla
- 250 g flour
- 2 tsp baking powder
- 2/3 tsp salt
Directions
- Preheat oven to 180 °C (350 °F).
- Beat together the peanut butter and the sugars, with an electric mixer.
- Mix in milk and vanilla.
- In a separate bowl, stir together flour, salt, and baking powder.
- Stir the dry ingredients into the wet ingredients, and then knead the dough a bit.
- (At this point, I put the dough in the fridge overnight, and baked it the next day.)
- Line your baking sheet with baking paper.
- Form tbsp-spoon-sized balls of dough.
- Press each one flat, with a fork, dipping the fork in water, before each press (to keep the dough from sticking to the fork).
-
@ c230edd3:8ad4a712
2024-10-30 17:28:09
Chef's notes
This is great to start in the morning, and come home to a nearly finished meal. I like to make tacos that day, then use any remaining for just about anything from chili to omelets. Fun way to prepare ramen too.
Details
- ⏲️ Prep time: 30 min, plus 15 before serving
- 🍳 Cook time: 8 hours
- 🍽️ Servings: 10-12
Ingredients
- 3-4lb Chuck Roast, bone-in preferred
- 1 large White Onion, quartered
- 6-8 cloves Garlic, peeled
- 5 Roma Tomatoes, halved
- 6-8 dried Arbol Chiles, seeded
- 3-4 Guajillo Chiles, seeded
- 2 tsp Coriander seeds
- 2 tsp Cumin seeds
- 2 Tbsp Oregano, Mexican Oregano if available
- 1/2 tsp ground Cinnamon
- 2 whole Bay Leaves
- 1 tsp Salt
- SPG style seasoning mix to coat the roast
- 3-4 cups beef broth, just enough to cover roast plus additional for thinning sauce if desired
- Any toppings desired (avocado, cilantro, sour cream, queso fresca, cheddar, fresh onion, etc)
Directions
- Preheat large frying pan to med/high, add oil for searing
- Add onions and tomatoes, sear until edges char, add garlic and saute until fragrant, transfer to slow cooker
- Pat roast dry, season all sides, transfer to pan
- Sear roast on all sides, 2-4 minutes or until golden brown, transfer to slow cooker
- Add all seasonings and beef broth to slow cooker
- Cook on low 8+ hours or until the meat is falling apart
- Remove bone and bay leaves
- Transfer liquid and vegetables to a blender with loose fitting lid, blend until smooth, transfer to large bowl
- Shred roast in slow cooker, pour sauce mix back in and stir. Adjust ratio by adding more beef broth if desired. Salt to taste.
- Serve, drained as tacos, nachos, omelets, etc. Serve with broth as stew or mix with ramen
-
@ 832b6aa8:2e4f082a
2024-10-28 18:38:54
Chef's notes
This Herb-Braised Beef Cheek recipe delivers tender, melt-in-your-mouth beef simmered slowly in a rich herb broth—without any wine! Sear the beef cheeks for a caramelized crust, then braise them with onions, garlic, carrots, and fresh herbs until perfectly tender. The dish is finished with a touch of lemon zest for brightness and pairs beautifully with creamy mashed potatoes or polenta, making it an ideal meal for cozy nights or special occasions. Perfect for anyone looking to enjoy a deeply flavorful, wine-free braised beef dish.
Details
- ⏲️ Prep time: 30 min
- 🍳 Cook time: 4 hrs
- 🍽️ Servings: 3-4
Ingredients
- 2 lbs beef cheeks, trimmed of excess fat
- Salt and pepper, to taste
- 2 tbsp olive oil
- 1 large onion, chopped
- 3 cloves garlic, minced
- 2 carrots, chopped
- 2 celery stalks, chopped
- 1 tsp tomato paste
- 4 cups beef broth (or chicken broth for a lighter flavor)
- 1 cup water
- 1 tbsp Worcestershire sauce
- 2 bay leaves
- 2 sprigs fresh rosemary
- 4 sprigs fresh thyme
- 1 tsp smoked paprika (optional)
- 1 tsp ground cumin
- Zest of 1 lemon (optional, for a fresh finish)
Directions
- Pat the beef cheeks dry with a paper towel, then season generously with salt and pepper. Sear the Beef Cheeks: In a heavy-bottomed pot or Dutch oven, heat the olive oil over medium-high heat. Sear the beef cheeks for 4–5 minutes on each side, until browned. Remove and set aside. Cook the Vegetables: Add the chopped onion, garlic, carrots, and celery to the pot. Sauté for about 5–7 minutes until softened and slightly caramelized. Add Tomato Paste: Stir in the tomato paste and cook for an additional 1 minute. Deglaze and Add Broth: Pour in 1 cup of water, scraping any browned bits from the bottom of the pot. Add the beef broth, Worcestershire sauce, bay leaves, rosemary, thyme, paprika, and cumin. Stir well. Add the Beef Cheeks Back In: Return the beef cheeks to the pot, ensuring they’re mostly submerged in the liquid. Simmer: Cover the pot and reduce the heat to low. Let the beef cheeks braise for 3–4 hours until they’re tender and easy to pull apart with a fork. Finishing Touch: Before serving, sprinkle with lemon zest for brightness. Taste and adjust seasoning with additional salt and pepper if needed. Serve: Serve over mashed potatoes, polenta, or creamy risotto, with the braising liquid as a sauce.
-
@ d1b118c6:4985b38d
2024-10-28 16:46:21
Chef's notes
So easy I promise
Details
- ⏲️ Prep time: 15 minutes
- 🍳 Cook time: 25-35 minutes
- 🍽️ Servings: 1-5 persons
Ingredients
- Squash
- Olive oil
- Salt
- Pepper
- Garlic seasoning
Directions
- Preheat oven to 400°F
- Peel the squash
- Cut the squash in half
- Scrape out all the seeds and guts (can save that stuff for something else or compost or whatever)
- Slice and dice up the remaining shell of a squash into 1inch (or so) sized pieces
- Mix all the pieces of squash with olive oil and various seasonings (suggested seasonings in the ingredients list but do whatever you want. This is what I had on hand along w some parsley actually)
- Lay all the squash out on a baking sheet nice and flat so that there aren’t any pieces overlapping
- Toss it in the preheated oven until it is soft to the fork tines and/or goldeny
- Enjoy. I had it on rice with soy sauce and would also be good with a fried egg on it. Add it to whatever squash would be good with
-
@ dbc828cc:ed78a663
2024-10-28 04:51:51
Chef's notes
Useful to know
- The oven for this recipe has a diameter of 1.50 meters, —with a 0.75 m. vault radius—; and it can hold at a time up to four trays (~50 cm. d. each) aside the fire;
- the kind of timber used to heat the oven also adds to the flavor; in this occasion the fuel is made out of timber of Taxodium mucronatum, locally known as "sabino tree";
- another local common is the amulet made out of lemons cut in half along nail-cloves nailed to the lemon, then distributed along the work area so the flies and critters bother less;
- the carbon result of the fire could be useful for heating cobbee and incense, being copal the traditional aroma used at these festivities;

- a mop, —made of natural fibers—, along a water bucket helps cool the oven in case of over heating; also, a common practice to get to know if the oven is ready is to look after a white color at the ceiling and the sides of the oven;
- ask advice to your local traditional pizza maker, look ahead their usual tools; be well hydrated and be prepared for sweating; you could be using a work table no less than 1.50 by 3.00 square meters; and another one half the same size for cooling the breads. Friendship, teamwork, music & dancing are usually commons around the making of this recipe too.

Final shout-outs
Chivo & Celia marriage is ought to receive praise for sharing the recipe with us and be that gentle to show us some not-so-known tricks. Comments, tips and zaps are going to be forwarded to them. Also a big shout-out to our honor guest, SF; and so as well a loud one to the nostriches, meshtadelians and noderunners.
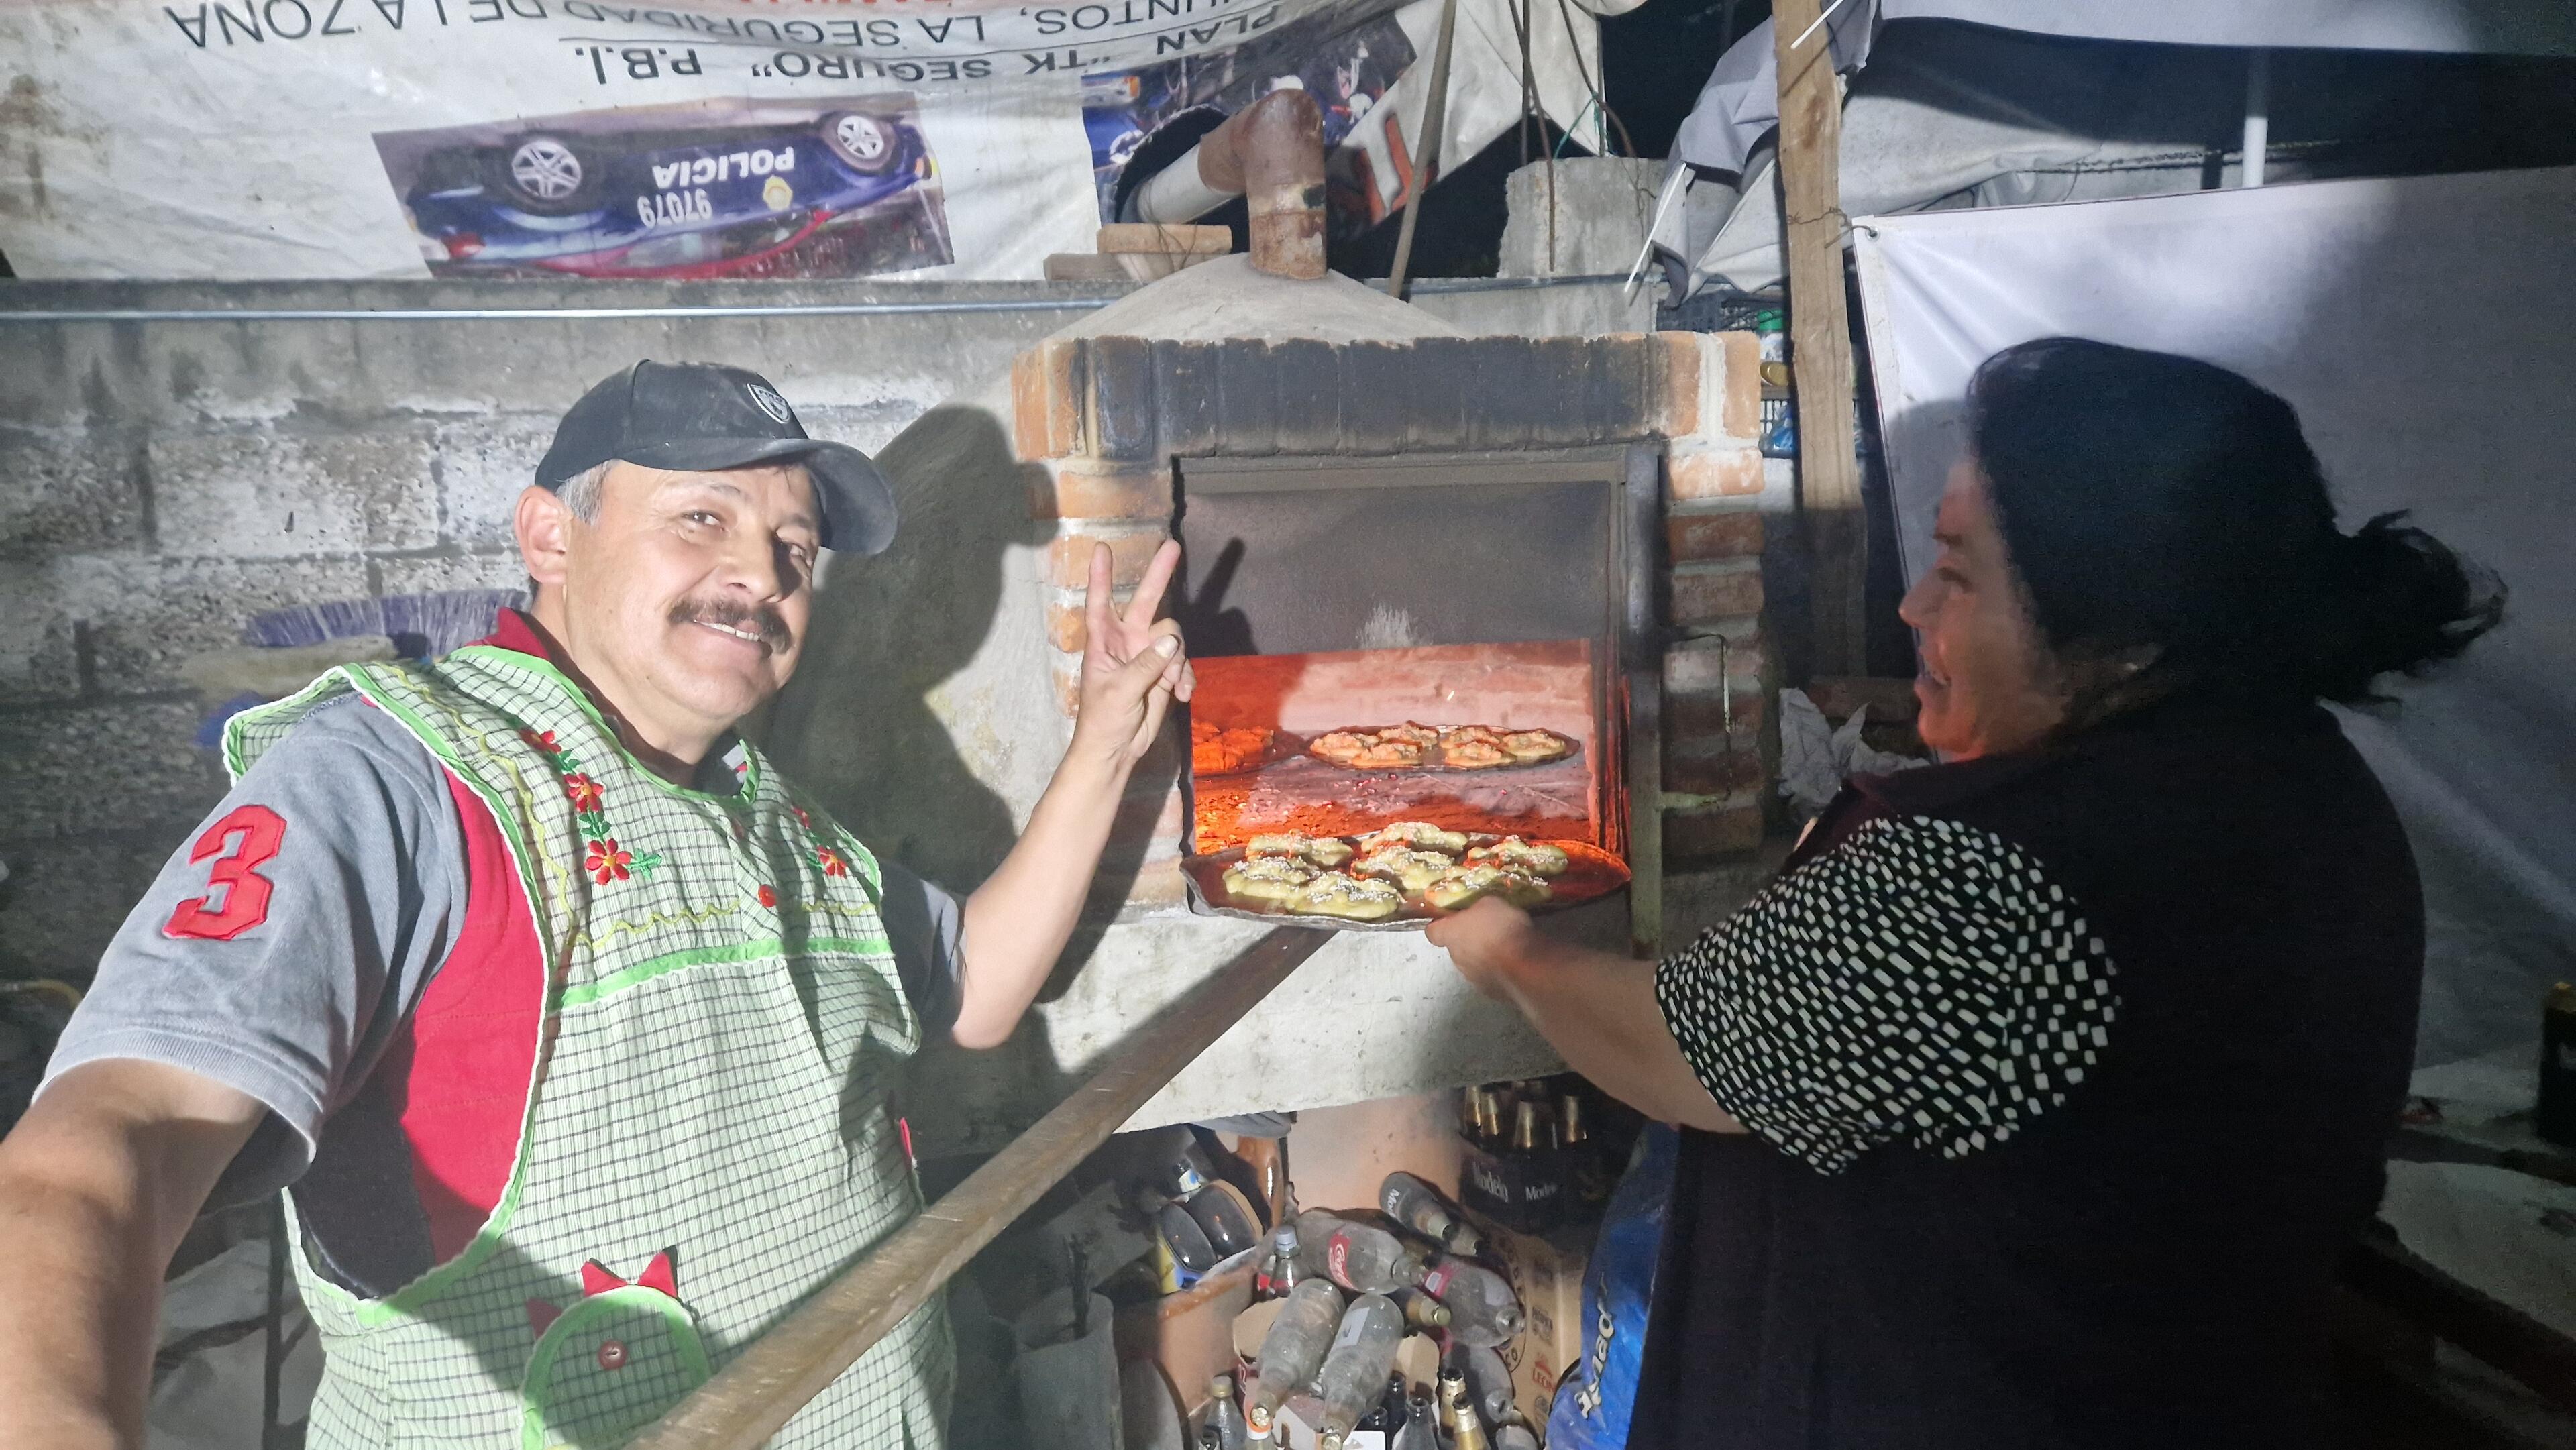
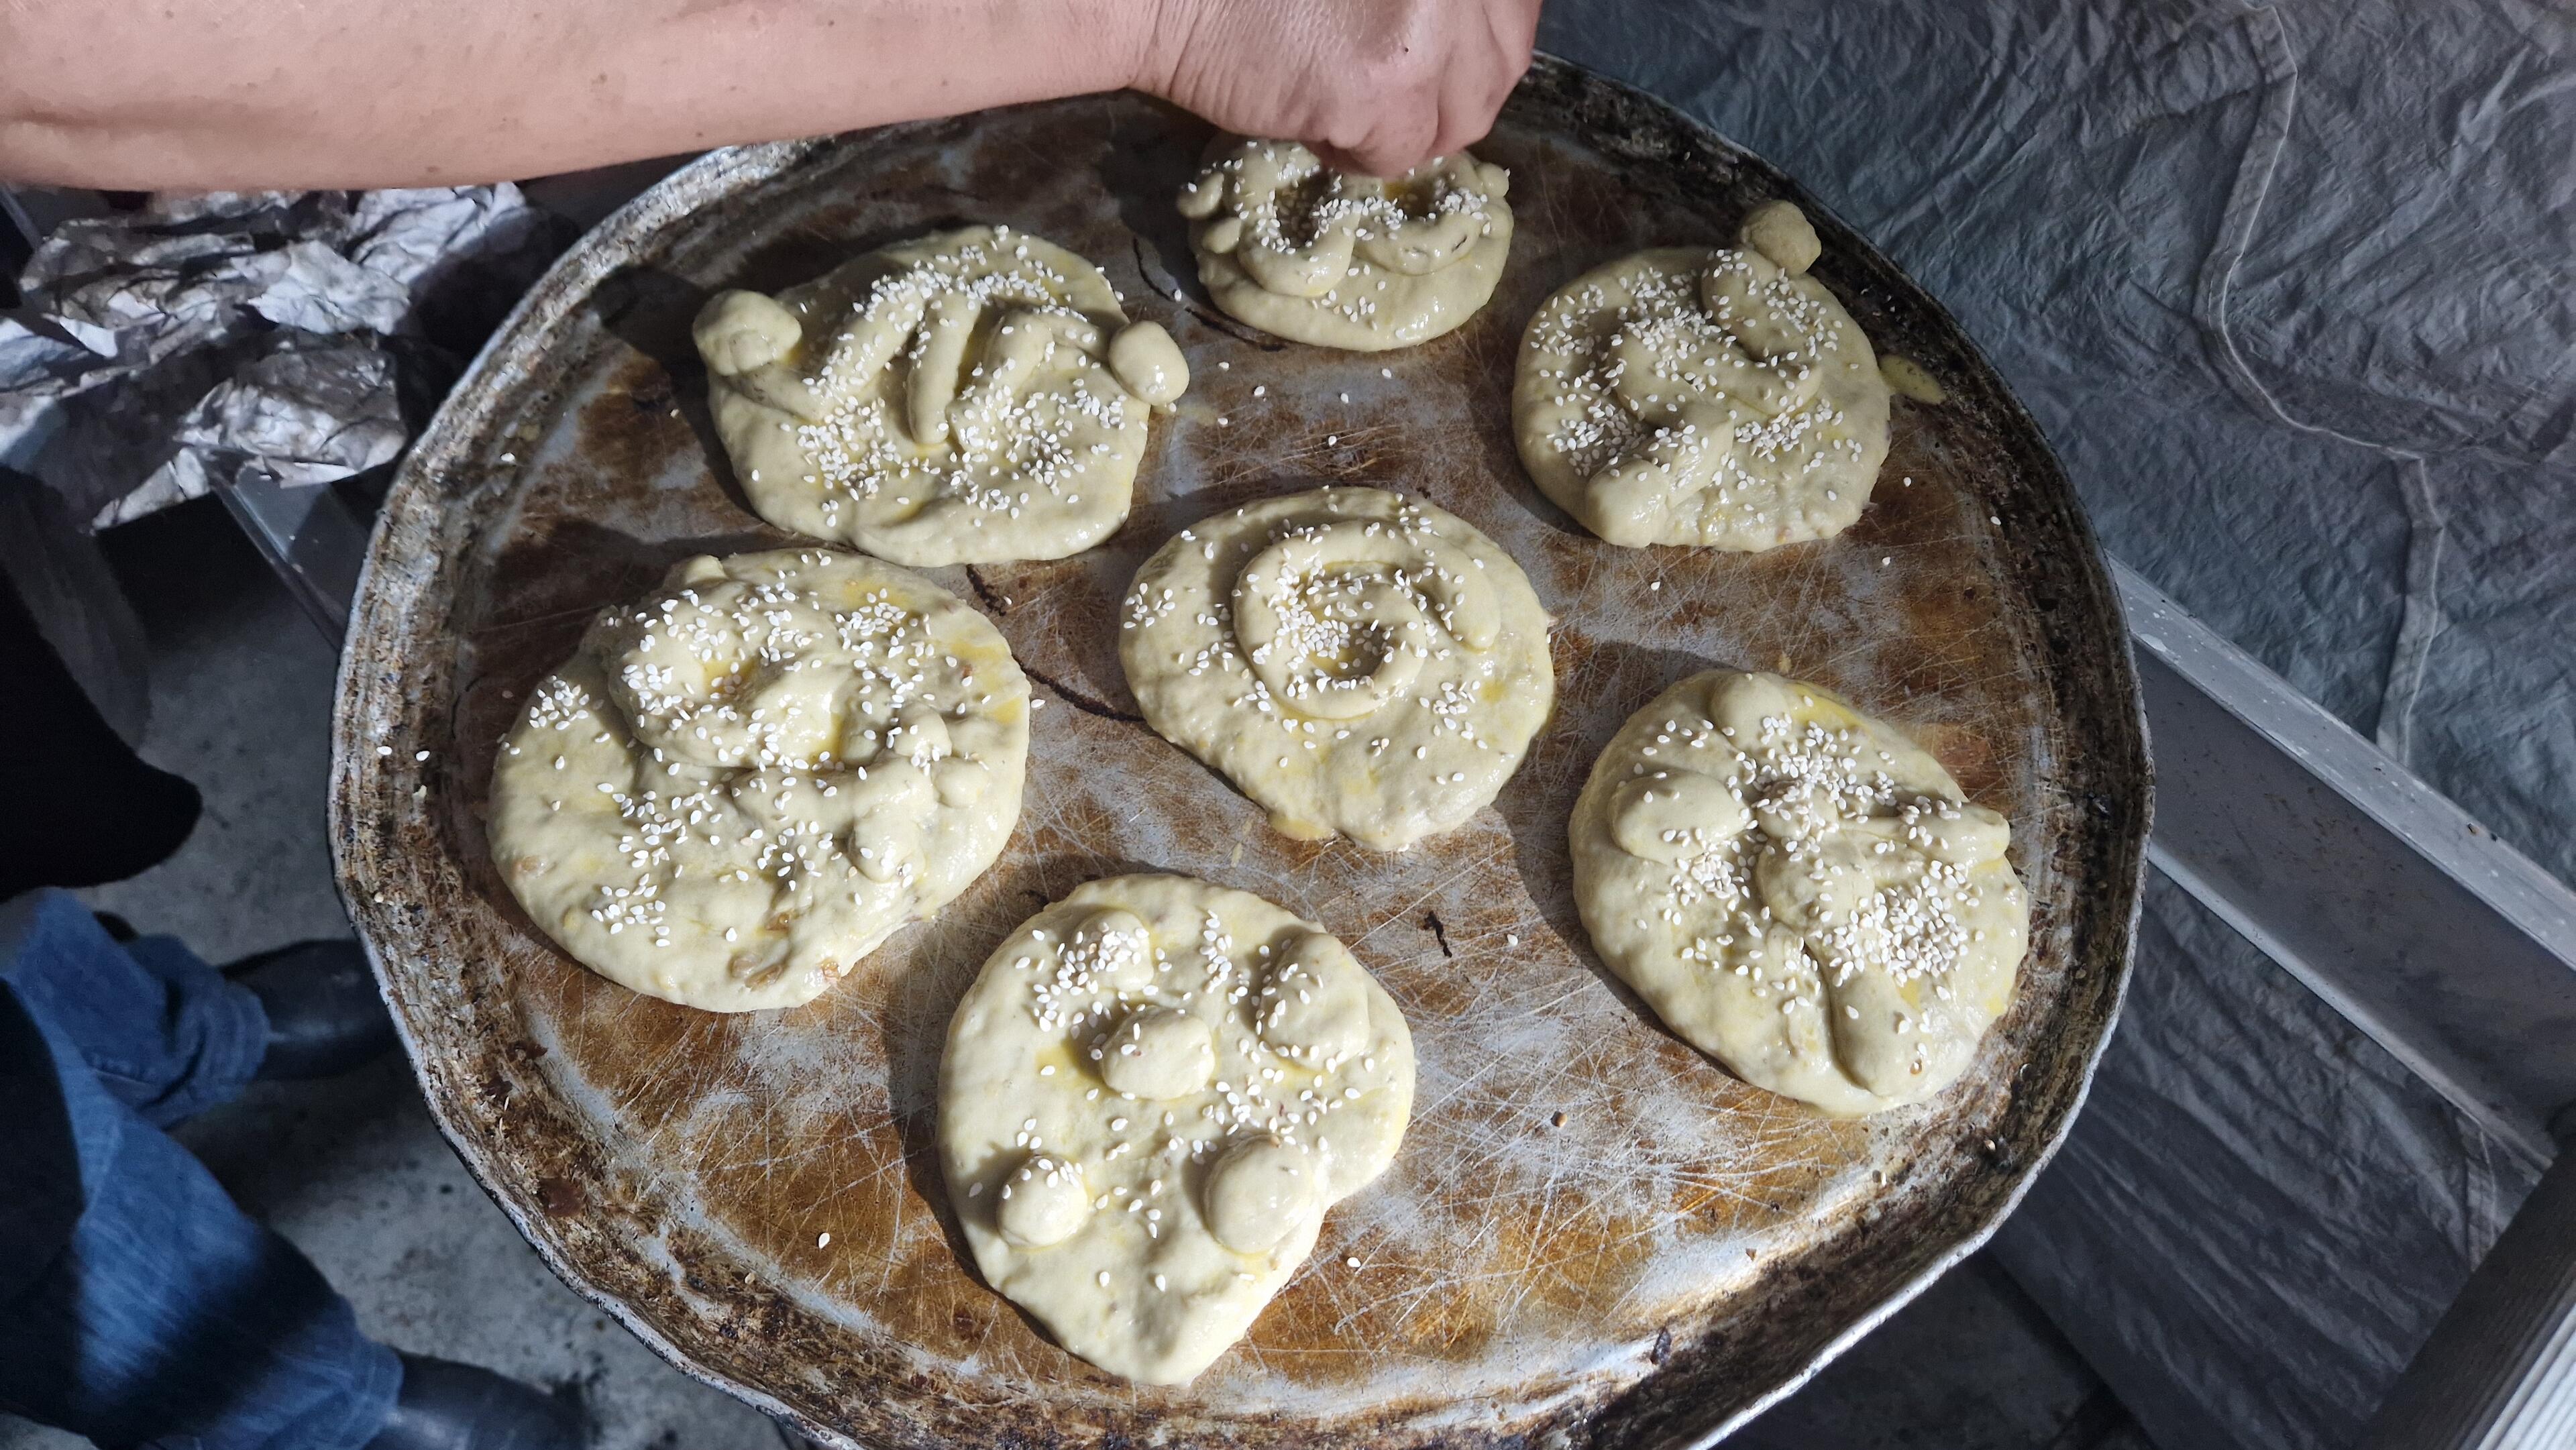
Details
- ⏲️ Prep time: 1 day
- 🍳 Cook time: 12 hours
- 🍽️ Servings: 20 plus
Ingredients
- Wheat flour; 10 kilograms
- Milk; 1 liter
- Chicken eggs; 60 units (20 yolks-only and 40 regular)
- Yeast; 1 kilogram
- Guava fruit; 1 kilogram
- Butter; 2 kilogram
- Salt; two spoons
- Shredded nuts; 1 kilogram
- Sesame seeds; 1 kilogram
Directions
- Set a wooden pyre within the oven a day before the baking; so early in the morning ignites and burns at ease. This is the pre heating, from here you would like to be adding small pieces of fuel to keep it warm until the baking starts.
- Remove the white out of 20 eggs and leave only the yolks; save the white for glazing after shaping the dough. The rest of the 40 (out of a total of 60 eggs) should be going to the mix at their normal. You could hold those eggs together in a recipe for the moment.
-
- Blend the guava fruit, —or your sweetener fruit of choice—, along half a liter of milk (ambient temperature). Strain the mix in order to separate seeds and residues apart. Hold it in a recipient.
- Blend slowly and manually together half a liter of milk, along 750 grams of yeast at slow to medium heat; you can put the mix near the entrance of the oven so the heat gets to dissolute the mix. Hold it in a recipe and cover it with a vegetal fabric to hold it warm.

- Build a volcano shape with about 9 kilograms of wheat flour; save 1 kilogram to be adding to your hands and dough whilst kneading.
- Pour a spoon of salt all around the perimeter of the volcano's top edge; and one more at the crater, —in Mexico, a common folk costume is to draw a cross of salt within the center of the crater—.
- Start building the dough by adding firstly the eggs and shredded nuts to the volcano crater. Start crushing with your hands by top-around of the edge towards the center of the crater. The both types of milks, —yeast and sweet—, along the liquid-heated butter are going to be added little by little as the mix demands. The whole knead might not take less than half an hour of force work; could be automatized with motor.


- Put the dough within a concave tray, deep enough to hold the fluffiness and cover it with natural fiber fabrics; it will take about half an hour before the dough fluffs enough to start shaping the bread.
- Adjust the temperature of the oven. Set at one side of the oven the wooden fuel. Add timber to heat; or wet the mop and mop the floor of the oven to cool it down. Ideal temperature should be around 180 ·C
- Grease the metal trays with fat or oil and start shaping the breads on them; if the trays are about 50 centimeters wide, up to 6 breads could be put in each without them blending together, try leave some empty space between them.

- The traditional bread shape consists of a round dough, —as a mini pizza—, and two crossed "bones" at the top. The bones can be shaped by rolling the dough with the fingers a little separate each other.
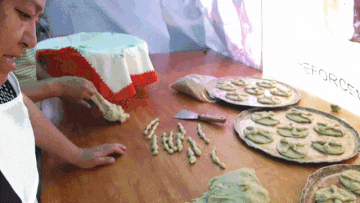
- Take some of the egg whites from earlier and add a couple extra more regular eggs and flap to make the glazing. Glaze using a little brush and add the sesame.
- The suggested technique for baking is to be rotating the trays either counter or clockwise. Each batch until the dough is done should take between 10 and 20 minutes.

- The glaze is indicative of the toast of the bread, ideally a golden brown-ish tone, with some dark spots are good looks of the OK finish. If by doing a cross cut to one of the breads you can notice a distinction of tones, that is, if the color is not uniform, then the bread was a little short of baking time.
- After cooling down the breads, you can store them within a cardboard box with a cover of natural fibers fabrics on the inside, so the breads remain wrapped.
- That must be it! by now those breads stored in the boxes could last for several weeks, —to months— without passing out... probably the why of the name bread of the dead.
- The traditional way to serving it is along with liquid chocolate, ideally the watery bitter one. As the bread is by itself sweet, to add sweet beverages could if something be a over sweet combination. If the bread already bricked, it could be crushed instead of your typical cereal plate. Dogs love them, haven't complained. If batch is too much for yourselves, don't forget these are ought to be put at the Día de los Fieles Difuntos offerings to honor our beloved deceased.
-
@ df478568:2a951e67
2024-10-27 18:31:30
Chef's notes
This is a delicious, quick and easy meal you can do on the weeknights. Serve with mash potatoes.
Details
- ⏲️ Prep time: 10 minutes
- 🍳 Cook time: 1 hour 10 minutes
- 🍽️ Servings: 4
Ingredients
- 4 lamb shanks
- 28 oz. Can of whole San Marzano tomatoes
- 2 table spoons of garlic powder
- 1/3 bottle of dry white wine(cheap stuff is fine)
- 2 table spoons of extra virgin olive oil
- 1 tsp salt
- 1 tsp pepper
- 1 bag of frozen carrots
Directions
- Place carrots in the Instant pot to rest the meat on.
- add the 4 lamb shakes on top of carrots
- pour tomato can into instant pot.
- sprinkle garlic powder into Instant Pot.
- drizzle 2 tablespoons of olive oil.
- add enought white wine to cover about a third of the meat.
- add salt and pepper.
- cook in instant pot for 1 hour.
- slow release 10 minutes
-
@ af9c48b7:a3f7aaf4
2024-10-23 19:16:52
Chef's notes
These "crackers" go well as a chip alternative when having carnivore tacos, as well as serves as a general snack. They are not really shelf stable and will get stale fairly quickly. I would recommend eating them within 24 hours of baking.
While any thickness of cheese can be used, I've found that the ultra thin sliced cheese works the best.
Details
- ⏲️ Prep time: 5
- 🍳 Cook time: 40-45 minutes depending on your oven.
- 🍽️ Servings: 1-2
Ingredients
- Ultra Thin Sliced Cheese (pick your favorite type)
- Parchment Paper
Directions
- Preheat oven to 250 degrees.
- While the oven is preheating, line a baking sheet with parchment paper.
- Take the individually sliced cheese and cut into any size you prefer. I recommend cutting in 4 equal squares for use as traditional cracker or "chip" when eating tacos.
- Place on the parchment paper allowing space between each cheese slice.
- Bake in a 250 degree oven for 40-45 minutes checking periodically to determine the cheese has achieved your desired level of crispness.
- One your cheese is done, remove from the oven and place the cheese slices on a paper towel to cool and allow for excess oil to drain.
- Place in a ziplock back and eat within 24 hours.
-
@ fa0165a0:03397073
2024-10-23 17:19:41
Chef's notes
This recipe is for 48 buns. Total cooking time takes at least 90 minutes, but 60 minutes of that is letting the dough rest in between processing.
The baking is a simple three-step process. 1. Making the Wheat dough 2. Making and applying the filling 3. Garnishing and baking in the oven
When done: Enjoy during Fika!
PS;
-
Can be frozen and thawed in microwave for later enjoyment as well.
-
If you need unit conversion, this site may be of help: https://www.unitconverters.net/
-
Traditionally we use something we call "Pearl sugar" which is optimal, but normal sugar or sprinkles is okay too. Pearl sugar (Pärlsocker) looks like this: https://search.brave.com/images?q=p%C3%A4rlsocker
Ingredients
- 150 g butter
- 5 dl milk
- 50 g baking yeast (normal or for sweet dough)
- 1/2 teaspoon salt
- 1-1 1/2 dl sugar
- (Optional) 2 teaspoons of crushed or grounded cardamom seeds.
- 1.4 liters of wheat flour
- Filling: 50-75 g butter, room temperature
- Filling: 1/2 - 1 dl sugar
- Filling: 1 teaspoons crushed or ground cardamom and 1 teaspoons ground cinnamon (or 2 teaspoons of cinnamon)
- Garnish: 1 egg, sugar or Almond Shavings
Directions
- Melt the butter/margarine in a saucepan.
- Pour in the milk and allow the mixture to warm reach body temperature (approx. + 37 ° C).
- Dissolve the yeast in a dough bowl with the help of the salt.
- Add the 37 ° C milk/butter mixture, sugar and if you choose to the optional cardamom. (I like this option!) and just over 2/3 of the flour.
- Work the dough shiny and smooth, about 4 minutes with a machine or 8 minutes by hand.
- Add if necessary. additional flour but save at least 1 dl for baking.
- Let the dough rise covered (by a kitchen towel), about 30 minutes.
- Work the dough into the bowl and then pick it up on a floured workbench. Knead the dough smoothly. Divide the dough into 2 parts. Roll out each piece into a rectangular cake.
- Stir together the ingredients for the filling and spread it.
- Roll up and cut each roll into 24 pieces.
- Place them in paper molds or directly on baking paper with the cut surface facing up. Let them rise covered with a baking sheet, about 30 minutes.
- Brush the buns with beaten egg and sprinkle your chosen topping.
- Bake in the middle of the oven at 250 ° C, 5-8 minutes.
- Allow to cool on a wire rack under a baking sheet.
-
-
@ 23acd1fa:0484c9e0
2024-10-23 09:21:33
Chef's notes
Cocoa powder: You can use 100% natural unsweetened cocoa powder or Dutch-processed cocoa powder – both work well.
Gluten free flour: There are many different gluten free flours on the market. I tested this recipe using White Wings All Purpose Gluten Free flour. I recommend choosing a gluten free flour that says it can be subbed 1:1 for regular plain or all purpose flour.
*Chocolate chips: Double check your chocolate chips are gluten free if you are making this brownie for someone who is celiac.
Cook times: Cook times will vary depending on your oven, but you’ll know these brownies are done when they firm up around the edges and no longer wobble in the middle. Keep in mind they will continue to cook slightly as they cool. You can also check they’re done by inserting a skewer into the middle of the brownie. If the skewer emerges with only a few crumbs on it, they’re ready. If it is covered in wet, gooey batter, keep baking the brownies and check them in another 5 minutes.
Storage: Brownies will keep well in an airtight container at room temperature or in the fridge for up to 5 days. To serve warm, microwave each brownie for 20 seconds. You can also freeze these brownies to enjoy at a later date. Simply thaw at room temperature and then microwave if you prefer them warm.
Serving Size: 1 brownie Calories: 278 Sugar: 26.4 g Sodium: 22.9 mg Fat: 15.5 g Carbohydrates: 34.1 g Protein: 3 g Cholesterol: 77.3 mg Nutrition information is a guide only.
Details
- ⏲️ Prep time: 20 min
- 🍳 Cook time: 35 min
- 🍽️ Servings: 12
Ingredients
- 170 grams (3/4 cup) unsalted butter, melted
- 200 grams (1 cup) caster sugar or granulated sugar
- 90 grams (1/2 cup) brown sugar
- 1 teaspoon vanilla extract
- 3 large eggs
- 40 grams (1/2 cup) cocoa powder
- 70 grams (1/2 cup) gluten free plain or all purpose flour
- 75 grams milk or dark chocolate chips*
Directions
- Preheat the oven to 180 C (350 F) standard / 160 C (320 F) fan-forced. Grease and line an 8-inch square pan with baking or parchment paper, ensuring two sides overhang.
- In a large mixing bowl, add melted butter and sugars and gently whisk together. Add vanilla extract and stir.
- Add the eggs, one at a time, stirring in-between, then sift in the cocoa powder and flour. Stir until just combined. Add chocolate chips.
- Pour the brownie batter in the prepared pan and place in the oven. Bake brownies for approximately 30-35 minutes or until they no longer wobble in the middle.
- Leave brownie in pan and transfer to a wire rack to cool completely. These brownies are quite fragile so if you can, transfer to the fridge for an hour before cutting into squares to serve.
-
@ 9349d012:d3e98946
2024-10-23 04:10:25
Chef's notes
Ingredients
4 tablespoons (1/2 stick) butter 2 ounces thinly sliced prosciutto, cut into thin strips 1 1/4 cups orzo (about 8 ounces) 3 cups low-salt chicken broth 1/2 teaspoon (loosely packed) saffron threads, crushed 1 pound slender asparagus, trimmed, cut into 1/2-inch pieces 1/4 cup grated Parmesan cheese Parmesan cheese shavings
Preparation
Melt 2 tablespoons butter in large nonstick skillet over medium-high heat. Add prosciutto and sauté until almost crisp, about 3 minutes. Using slotted spoon, transfer to paper towels to drain. Melt 2 tablespoons butter in same skillet over high heat. Add orzo; stir 1 minute. Add broth and saffron; bring to boil. Reduce heat to medium-low, cover, and simmer until orzo begins to soften, stirring occasionally, about 8 minutes. Add asparagus; cover and simmer until tender, about 5 minutes. Uncover; simmer until almost all liquid is absorbed, about 1 minute. Remove from heat. Mix in prosciutto and 1/2 cup grated cheese. Season to taste with salt and pepper. Transfer to large bowl. Garnish with Parmesan shavings. Makes 6 servings.
Details
- ⏲️ Prep time: 30
- 🍳 Cook time: 30
Ingredients
- See Chef’s Notes
Directions
- See Chef’s Notes
-
@ 75d12141:3458d1e2
2024-10-23 00:20:14
Chef's notes
A childhood favorite of mine! Just don't go too crazy with the scallions as you don't want to overpower the pork flavor.
Details
- ⏲️ Prep time: 15
- 🍳 Cook time: 15-20 mins
- 🍽️ Servings: 3-5
Ingredients
- 1 pound of lean ground pork
- 1 tablespoon of diced scallions
- Ground black pepper (optional)
Directions
- Lightly coat your palms with olive oil to prevent the meat from sticking to you and to assist in keeping its ball form
- Mix the ground pork and diced scallions in a large bowl
- Roll the pork into the preferred portion size until it feels like it won't fall apart
- Cook in a skillet for 15-20 mins
-
@ 18bdb66e:82eb5e5d
2024-10-21 23:44:52
Details
- ⏲️ Prep time: 20 mins
- 🍳 Cook time: 20 mins
- 🍽️ Servings: 4
Ingredients
- 1 Can (10.5 ounce) each condensed beef noodle, bean with bacon, and cream of celery soup
- 2 Soup cans water
- 2 TBSP chopped parsley
- 1 TBSP Worcestershire
Directions
- Combine soups and water.
- Add parsley and Worcestershire
- Heat to simmer.
-
@ 18bdb66e:82eb5e5d
2024-10-21 23:41:04
Chef's notes
Add cooked rice to stretch. Serve with celery for crunch. Top with Parmesan cheese for a nice change. You can also use red or yellow sweet peppers instead of or along with the green peppers.
Details
- ⏲️ Prep time: 20 mins
- 🍳 Cook time: 20 mins
- 🍽️ Servings: 4
Ingredients
- 1 TBSP Chopped green pepper
- 2 TBSP Chopped onion
- Dash oregano
- 2 TBSP butter
- 1 Can (10.5 ounce) condensed tomato soup
- 1 Soup can Water
Directions
- Cook green pepper, onion, oregano in butter until tender.
- Add soup, and water.
- Heat till simmer, stirring often.
-
@ 18bdb66e:82eb5e5d
2024-10-21 23:35:35
Chef's notes
Serve with crackers
Details
- ⏲️ Prep time: 20 mins
- 🍳 Cook time: 20 mins
- 🍽️ Servings: 4
Ingredients
- ¼ Cup Spam
- 1 TBSP butter
- 1 Can (10.5 ounce) gumbo soup
- 1 Soup can water
- Dash Tabasco
Directions
- Brown Spam in butter.
- Mix gumbo, water, and heat to simmer.
- Add Spam.
- Tabasco to taste
-
@ 18bdb66e:82eb5e5d
2024-10-21 23:30:47
Chef's notes
Trim down bread to fit serving bowl, if necessary, prior to broiling. Try using a biscuit cutter for perfect bread rounds. A cookie cutter could be used to treat children.
The addition of the vegetable juice creates a fuller flavor than the previous onion soup recipe.
Details
- ⏲️ Prep time: 20 mins
- 🍳 Cook time: 20 mins
- 🍽️ Servings: 4
Ingredients
- 1 Can (10.5 ounce) condensed onion soup
- 1 Soup can water
- ½ Soup can V8 juice
- 2-3 slices French, or Italian bread, or Texas Toast
- Butter
- Parmesan cheese
Directions
- Combine soup and water.
- Heat to simmer.
- Place bread on baking sheet, butter, and top with cheese.
- Broil bread until browned.
- Ladle soup in bowl
- Top soup with bread
-
@ 18bdb66e:82eb5e5d
2024-10-21 23:25:20
Chef's notes
Try using a biscuit cutter for perfect bread rounds. A cookie cutter could be used to treat children.
Details
- ⏲️ Prep time: 20 min
- 🍳 Cook time: 20 mins
- 🍽️ Servings: 4
Ingredients
- 1 Can (10.5 ounce) condensed onion soup
- 1 Soup can water
- 2-3 slices French, or Italian bread, or Texas Toast
- Butter
- Parmesan cheese
Directions
- Combine soup and water.
- Heat to simmer.
- Place bread on baking sheet, butter, and top with cheese.
- Broil bread until browned.
- Ladle soup in bowl
- Top soup with bread
- Trim down bread to fit serving bowl, if necessary, prior to broiling.
-
@ 18bdb66e:82eb5e5d
2024-10-21 23:19:57
Chef's notes
Serve with coleslaw, and chips on the side. Pictured here using English muffin, with a side of mung bean sprouts.
Details
- ⏲️ Prep time: 20 mins
- 🍳 Cook time: 20 mins
- 🍽️ Servings: 4
Ingredients
- ¼ Cup Chopped onion
- 2 TBSP Chopped green pepper
- 1 TBSP butter
- 1 LB Ground beef
- 1 can (10.5 ounce) bean with bacon soup
- ½ Cup water
- ⅓ Cup ketchup
- Hamburger buns, toasted
Directions
- Cook onion and green pepper in butter until tender.
- Add crumbled ground beef, brown
- Add soup, water, and ketchup
- Heat to simmer, stir often for five minutes.
- Spoon on buns, serve.
-
@ 18bdb66e:82eb5e5d
2024-10-21 23:04:53
Chef's notes
Use slotted spoon to place green beans on toast.
Details
- ⏲️ Prep time: 20 mins
- 🍳 Cook time: 20 mins
- 🍽️ Servings: 4
Ingredients
- ¼ cup Chopped onion
- 2 TBSP butter
- 1 Can (10 ½ ounces) condensed cream of chicken soup.
- ⅓ cup milk
- 1 can (5 ounce) chicken, or 1 cup diced cooked chicken
- 2 boiled eggs, sliced
- 4 Slices of toast
- French style green beans, cooke
Directions
- Cook onion in butter until soft, not brown
- Mix soup, milk, chicken, and most eggs, add to onion. (Reserve some egg for garnish)
- Heat through stirring often.
- Heat beans, divide equally and spoon on toast.
- Top beans with chicken.
- Garnish with remaining egg.
-
@ ff18165a:dd7ca7f0
2024-10-19 18:23:51
Chef's notes
- DO NOT add too much Peppermint Extract! It’s extremely strong and it will make your milkshake way too strong if you add more than a few drops.
- Feel free to be creative with your toppings. We used Caramel Flavored Whipped Topping and it turned out great!
Details
- ⏲️ Prep time: 5 min
- 🍳 Cook time: 2 min
- 🍽️ Servings: 1
Ingredients
- 1 1/2 cup Milk
- 2 drops Peppermint Extract
- 2 packets Stevia
- 1 cup Ice
- 2 drops Green Food Coloring
- Green Sprinkles
- 1 Crushed Peppermint Candy
- 2 Mint Leaves
Directions
-
- Blend together until smooth and frothy
-
- Pour into a tall glass
-
- Top with listed toppings
-
- Add straw and enjoy
-
@ d3f06d83:7ff53dc3
2024-10-15 00:30:10
Chef's notes
This is the beginning of a great pizza.
Details
- ⏲️ Prep time: 15 min
- 🍳 Cook time: 0
- 🍽️ Servings: 0
Ingredients
- 1 cup of pizza flour or bakery flour (00 flour)
- 1 zatchet of yeast (7g)
- 1 cup of water
- 1 spoon of honey (or sugar)
- 2 Litre container with a lid
Directions
- Pour the water in a 2L container
- Add honey/sugar and stir
- Add the yeast and stir. Wait 15 minutes or until the yeast is active (bubbling)
- Slowly mix the flour avoiding clumps
- Close the lid and leave in the fridge overnight
-
@ 18bdb66e:82eb5e5d
2024-10-15 00:28:32
Chef's notes
Serve with bread, and side salad
Details
- ⏲️ Prep time: 5 mins
- 🍳 Cook time: 10 mins
- 🍽️ Servings: 2-4
Ingredients
- 1 Can (10 ½ ounces) condensed chicken gumbo soup
- ½ Soup can tomato juice
- ½ Soup can water
- Croutons
Directions
- Add soup, juice, and water.
- Heat through, stirring often.
- Serve with croutons
-
@ 18bdb66e:82eb5e5d
2024-10-15 00:20:20
Chef's notes
Serve with bread, and side salad.
Details
- ⏲️ Prep time: 5 mins
- 🍳 Cook time: 10 mins
- 🍽️ Servings: 2-4
Ingredients
- 1 Can (10 ½ ounces) condensed chicken noodle soup
- ½ Soup can V8 juice
- ½ Soup can water
- Croutons
Directions
- Add soup, V8, and water.
- Heat through, stirring often.
- Serve with croutons
-
@ 18bdb66e:82eb5e5d
2024-10-15 00:16:16
Chef's notes
Serve with bread, and side salad.
Details
- ⏲️ Prep time: 5 mins
- 🍳 Cook time: 10 mins
- 🍽️ Servings: 2-4
Ingredients
- 1 can (10.5 ounces) condensed cream of mushroom soup
- 1 Can (10 ½ ounces) condensed chicken noodle soup
- 1 can (10.5 ounces) condensed vegetable soup.
- 3 Soup cans water
- Croutons
Directions
- Add soups, and water.
- Heat through, stirring often.
- Serve with croutons
-
@ 18bdb66e:82eb5e5d
2024-10-15 00:11:19
Chef's notes
Serve with crackers, or croutons, and side salad. Fiesta Nacho cheese soup gives a pleasant kick of flavor
Details
- ⏲️ Prep time: 5 mins
- 🍳 Cook time: 10 mins
- 🍽️ Servings: 2-4
Ingredients
- 1 Can (10.5 ounces) condensed Cheddar cheese soup
- 1 Cans (10 ½ ounces) condensed tomato soup
- 2 Soup cans water
- Bacon, fried and crumbled.
Directions
- Combine soups, and water.
- Heat through, stirring often.
- Garnish with bacon.
-
@ 18bdb66e:82eb5e5d
2024-10-15 00:05:38
Chef's notes
Trim down bread to fit serving bowl, if necessary, prior to broiling. Top with Parmesan cheese.
Details
- ⏲️ Prep time: 20 mins
- 🍳 Cook time: 10 mins
- 🍽️ Servings: 2-4
Ingredients
- 1 Can (10.5 ounce) condensed onion soup
- ½ Soup can water
- ½ Soup can V8 juice
- 4 Ounces sliced roast beef
- 2-3 slices French, or Italian bread, or Texas Toast
- Butter
- Parmesan cheese
Directions
- Combine soup, water, and V8 juice.
- Heat to simmer.
- Add roast beef, heat throug
- Ladle soup in bowl
- Top soup with bread
- Top bread with roast beef
-
@ 18bdb66e:82eb5e5d
2024-10-14 23:58:32
Chef's notes
Serve with side salad.
Details
- ⏲️ Prep time: 10 mins
- 🍳 Cook time: 10 mins
- 🍽️ Servings: 2-4
Ingredients
- 3 sausage links cut into penny sized slices, or two patties crumbled
- 2 Cans (10 ½ ounces) condensed minestrone soup
- 1 can (10.5 ounces) condensed tomato soup.
- 3 Soup cans water
- Croutons
Directions
- Brown sausage in saucepan
- Add soups, and water
- Heat through, stirring often.
- Garnish with croutons
-
@ 18bdb66e:82eb5e5d
2024-10-14 23:48:00
Chef's notes
Serve over baked potato, cooked white rice, or drop biscuits.
Details
- ⏲️ Prep time: 15 mins
- 🍳 Cook time: 10 mins
- 🍽️ Servings: 2-4
Ingredients
- 2 - 4 Hotdogs, sliced thin
- 1 TBSP Butter
- 1 Can (10.5 oz) bean & bacon soup
- 1 Can (10.5 oz) condensed pea soup
- 1 Soup can of milk
- 1 Soup can of water
Directions
- Lightly brown hotdogs in butter.
- Mix soups, milk, and water in a bowl.
- Add soup mix to hotdogs, heat through but do not boil.
-
@ c0e0c427:a1f63a16
2024-10-14 09:15:50
Chef's notes
Some say beat the cream as hard as you can but I find I have much better success when I take my time. So take it easy and be patient and that magic butter moment will arrive.
Details
- 🍳 Cook time: 15 min
- 🍽️ Servings: Approx 250g butter
Ingredients
- Pure fresh cream
- Salt
Directions
- Keep cream in the fridge until ready to start.
- Pour cream into a bowl.
- Beat with hand mixer or kitchen betchtop mixer with the balloon whisk.
- Maintain a medium power level in the mixer throughout. Note that it can get messy with lots of splatter and you might like to have a tea towel over the operation to limit clean up.
- After 5 min the cream will be whipped this is a great sign! Keep going.
- After 10 -15 min you’ll see the cream start to separate into solids and buttermilk.
- Keep whisking until you see the bright yellow butter solids start to clump together in the mixer.
- Pour off the buttermilk and save for later (bonus side product that makes the best pancakes and is actually really great in scrabbled eggs)
- Rinse in butter solid with cold water to remove all the buttermilk. This is an important step and the buttermilk increases the rate of spoil.
- Mix in salt and shape the butter into a block.
- Wrap and store in the fridge.
-
@ c0e0c427:a1f63a16
2024-10-14 09:00:51
Chef's notes
I reuse my basic pickle brine at least once. Pickle brine is all about your preference. Make it as sweet as you like with extra sugar, spicy as heck so you are remembering you had them the morning after or a little extra zesty by changing the ratio of water to vinegar to 1:1. Note that the ratio is by weights and I use metric instead of freedom units because that is how I work but imperial will work if for keep the ratio the same by WEIGHT.
Details
- ⏲️ Prep time: 20 min
- 🍳 Cook time: 0 min
Ingredients
- 50mls apple cider vinegar
- 100mls water
- 50grams sugar
- Fresh dill
- Chilli
- 5-10 cucumbers
Directions
- Mix vinegar water together in a pot and bring to a simmer
- Turn off the heat and stir in the sugar until dissolved.
- Add into the brine fresh dill and chilli to your preferred taste.
- Allow brine to cool.
- Chop cucumbers into rounds or julienne and place into a clean and sterilised jar.
- Pour brine into jar so cucumbers are fully covered.
- Can enjoy in 2 days. Keeps up to 2 months.
-
@ 18bdb66e:82eb5e5d
2024-10-14 02:23:59
Chef's notes
Cook pancakes ahead of time and freeze. Move to refrigerator the night before serving.
Details
- ⏲️ Prep time: 20 mins
- 🍳 Cook time: 20 mins
- 🍽️ Servings: 4
Ingredients
- 4 Slices Bacon
- 1 Can (10.5 ounce) condensed cream of chicken or mushroom soup
- ½ cup milk
- 4 boiled eggs, sliced
- 2 TBSP pimiento, chopped
- Pancakes
Directions
- Cook bacon until crisp; remove and crumble
- Pour off drippings
- Blend soup and milk;
- Add bacon, eggs, and pimiento.
- Heat through stirring frequently.
- Spoon between pancakes, sandwich style.
-
@ 18bdb66e:82eb5e5d
2024-10-14 02:15:49
Details
- ⏲️ Prep time: 20 mins
- 🍳 Cook time: 10 mins
- 🍽️ Servings: 4
Ingredients
- 1 Can (10 ½ ounces) condensed Cheddar, or cream of celery soup.
- ½ cup milk
- 4 boiled eggs, sliced
- 2 TBSP pimiento, chopped
- 4 Slices of toast
Directions
- Add soup and milk in medium pot.
- Mix in egg slices, and pimiento reserving some for garnish.
- Heat through, stirring often.
-
@ 18bdb66e:82eb5e5d
2024-10-14 02:05:51
Chef's notes
Try Fiesta Cheese soup for a little flavor kick. Omit lemon juice and pepper.
Details
- ⏲️ Prep time: 20 mins
- 🍳 Cook time: 15 mins
- 🍽️ Servings: 4
Ingredients
- 8 Strips bacon
- 1 Can Cheddar cheese soup
- ½ Cup milk
- 1TSP Lemon juice
- Cayenne pepper to taste
- 2 Medium tomatoes, sliced
- 4 Slices toast
Directions
- Cook bacon. Set drippings aside.
- Add soup to skillet
- Heat to simmer
- Add milk, lemon juice, and pepper
- Blend till smooth
- Heat slowly so as not to scorch milk.
- Plate toast, and lay tomato and bacon on each slice.
- Ladle soup over toast.
-
@ 18bdb66e:82eb5e5d
2024-10-14 01:57:16
Chef's notes
Serving with Texas Toast is a great option.
Details
- ⏲️ Prep time: 15 mins
- 🍳 Cook time: 10 mins
- 🍽️ Servings: 4
Ingredients
- 2 TBSP butter, melted
- 1 Can (10.5 ounce) condensed cream of celery soup
- ½ Cup milk
- ¼ Cup chopped onion
- 1 Package (4 ounces) sliced beef
- Toast
Directions
- Melt butter in heavy skillet.
- Brown beef and onion in butter.
- Mix soup and milk.
- Add soup to skillet.
- Heat; stirring often.
- Serve on hot toast.
-
@ 18bdb66e:82eb5e5d
2024-10-14 01:52:01
Chef's notes
Garnish with chopped green onions, mushrooms, or serve with a side of carrots for variety.
Details
- ⏲️ Prep time: 10 mins
- 🍳 Cook time: 10 mins
- 🍽️ Servings: 4
Ingredients
- 2 cans condensed beef broth
- 2 soup cans of water
- ½ bay leaf
- 1 egg
Directions
- Add soup, water, and bay leaf in pot.
- Bring soup to boil, reduce heat
- Simmer 5 minutes
- Remove bay leaf and discard.
- Beat egg slightly.
- Pour thin stream of egg into soup while stirring.
- Salt and pepper to taste.
- Serve with toast.
-
@ 18bdb66e:82eb5e5d
2024-10-14 01:15:00
Chef's notes
Serve with a breakfast meat, and toast.
Details
- ⏲️ Prep time: 20 mins
- 🍳 Cook time: 10 mins
- 🍽️ Servings: 4
Ingredients
- 2 TBSP butter, melted
- 1 can (10.5 ounce) condensed Cheddar cheese, cream of celery, chicken, or mushroom soup
- 8 eggs
- Pepper to taste
Directions
- Melt butter in heavy skillet.
- Mix in soup, eggs and pepper in bowl or measuring cup.
- Add soup to skillet.
- Cook over low heat until eggs are set, stirring gently.
-
@ 18bdb66e:82eb5e5d
2024-10-14 01:12:56
Chef's notes
Crack one egg at a time into small bowl, then ease into soup mixture before cracking the next egg. Use a slotted spoon to remove egg from soup mixture.
Details
- ⏲️ Prep time: 20 mins
- 🍳 Cook time: 10 mins
- 🍽️ Servings: 3
Ingredients
- 2 TBSP butter
- 1 can (10.5 ounce) condensed cream of celery, chicken, or mushroom soup
- ½ cup milk
- 6 eggs
- 3 English muffins (split, toasted, buttered)
Directions
- Melt butter in heavy skillet.
- Mix in soup and milk in bowl or measuring cup.
- Add soup to skillet, heat to boiling
- Gently ease eggs into soup mixture.
- Reduce to simmer. Cook over low heat until whites are firm.
- Place one egg each on a muffin half.
- Spoon soup mixture over egg and muffin.
-
@ e7211c22:e87afeee
2024-10-12 02:46:09
Chef's notes
If you do one thing to improve your health in the kitchen, ditch the industrial seed oils and make your own mayonnaise. Make sure to use virgin coconut oil and extra virgin olive oil, not light or refined olive oil. That being said, use extra virgin olive oil from a lighter tasting olive variety, such as Arbequina, or mayonnaise will have a strong olive oil taste. Where do you get extra virgin olive oil from you may ask? Ugly olives, of course. The addition of yogurt and whey greatly extend the shelf life of your mayonnaise from 1-2 weeks to 1-2 months in the refrigerator, while adding beneficial probiotics. To spice up you mayonnaise, see end of directions.
Details
- ⏲️ Prep time: 15 minutes
- 🍳 Cook time: 0 minutes
- 🍽️ Servings: lots
Ingredients
- 1 whole egg
- 2 egg yolks
- 1 Tbsp Grey Poupon
- 1 Tbsp lemon juice
- 1/2 tsp salt
- dash white pepper
- 1/2 cup virgin coconut oil, warmed to liquid
- 1/2 cup extra virgin olive oil, from a lighter tasting olive variety, such as Arbequina
- 1 Tbsp plain yogurt
- 1 Tbsp whey
Directions
- Mix first six ingredients in a bowl with an immersion blender or food processor.
- Combine oils in pourable measuring cup.
- Slowly, drip by drip, begin to add oil to first six ingredients while running immersion blender or food processor. If oil is added too quickly at first, emulsification will not occur and mayonnaise will be ruined.
- Continue adding oil to first six ingredients drip by drip, increasing to slow drizzle, then thin stream, then steady stream. Take breaks pouring oil if necessary to completely blend in oils.
- Add yogurt and whey. Refrigerate.
- To spice up your mayonnaise: Sriracha mayonnaise - with first six ingredients add 1 clove garlic, mashed, 2 Tbsp sriracha, 2 Tbsp lime juice, and an additional 1/4 tsp salt. Chipotle lime mayonnaise - replace 1 Tbsp lemon juice with 1 Tbsp lime juice, with first six ingredients add 1 clove garlic, mashed, 1/4-1/2 can chipotle peppers in adobo sauce, 2 limes juiced and zested, and an additional 1/4 tsp salt.
-
@ c69b71dc:426ba763
2024-10-10 09:05:29
Chef's notes
This cashew blue cheese is a true plant-based delight, delivering the rich, tangy flavours you’d expect from traditional blue cheeses like Roquefort or Gorgonzola. The fermentation process, with the help of «Penicillium Roqueforti», creates a beautifully marbled, creamy cheese that’s both bold and complex. It’s a labor of love that rewards your patience with an unforgettable vegan cheese experience! Whether enjoyed on crackers, in salads, or simply on its own, this cheese will elevate any dish with its unique flavour profile.
Note 1: For this recipe you need parchment paper, a potent blender, glass jars with lid and two cheesecloths.
Note 2: Always use very clean tools, and avoid touching with your fingers or tasting with them while working on the cheese!
Details
- ⏲️ Prep time: 4-5 weeks
- 🍳 Cook time: 0
- 🍽️ Servings: Two small cheese loaves (2x 10-12 cm diameter)
Ingredients
- 300g raw cashews
- 3 tbsp water
- 3 tbsp kefir, kombucha or rejuvelac
- 2 tbsp coconut oil (raw, unrefined)
- 1-4 capsules vegan probiotics
- 1/2 tsp Himalayan salt (iodine-free, no additives)
- 1/16 tsp «Penicillium Roqueforti» (blue cheese mold culture)
Directions
- Day 1: Soak 300g of cashews overnight in water.
- Day 2: Rinse the soaked cashews thoroughly and let them drain well.
- In a high-speed blender, combine the cashews, 3 tbsp of water, 3 tbsp kefir or rejuvelac, and 2 tbsp coconut oil. Blend until the mixture is smooth and creamy.
- Add 1-4 capsules of vegan probiotics, 1/2 tsp Himalayan salt (free of iodine and additives), and blend again briefly.
- Add a pinch (about 1/16 tsp) of «Penicillium Roqueforti» powder (blue cheese culture) and give it another quick mix.
- Transfer the cashew mixture to a glass container, leaving the lid lightly on top (do not seal it completely) and store in a warm place, ideally in your kitchen, for 24 hours to ferment.
- Day 3: Divide the fermented cashew mixture into two smaller glass containers lined with cheesecloth. Press the mixture down firmly to eliminate air pockets.
- Store in a cool place (12-14°C / 53-57°F), ideally in a wine fridge.
- Day 4: Remove the cheese from the containers, take off the cheesecloth, and turn the cheese onto parchment paper.
- Sprinkle salt all over the cheese, ensuring it is evenly coated.
- Cover the cheese with larger glass bowls, ensuring that air can flow from underneath, and return to the wine fridge or the cool storage area.
- Days 4-7: Turn the cheese daily onto fresh parchment paper to maintain its texture.
- Day 7 or 8: Pierce the cheese with a thicker wooden skewer to create holes, allowing oxygen to reach the center, encouraging the blue mold to grow throughout the cheese, not just on the surface.
- Alternatively, crumble the cheese completely and then press it back into shape to ensure oxygen distribution.
- Days 8 toaround 12 or 15: Once the blue mold has fully developed around and inside the cheese, wrap the cheese in parchment paper, place it in a wooden cheese box, and then wrap it in a cloth bag.
- Transfer to a regular fridge to age for another 2-3 weeks or even several months, depending on your desired strength of flavour.
-
@ e7211c22:e87afeee
2024-10-09 15:45:58
Chef's notes
Originally from American Lamb Passport recipe booklet
Details
- ⏲️ Prep time: 30 minutes
- 🍳 Cook time: 20 minutes
- 🍽️ Servings: 4
Ingredients
- 1.5 lbs ground mutton or lamb
- 1/3 cup yellow onion, diced
- 3 cloves garlic, minced
- 1.5 tsp dried oregano
- kosher salt, to taste
- 3 chipotle chiles in adobo sauce, finely chopped, plus 3 Tbsp sauce
- 4 cups cabbage, finely shredded
- 1 bunch radishes, thinly sliced
- 1 cup fresh pineapple, diced
- 4 green onions, thinly sliced
- 1/3 cup fresh cilantro, coarsely chopped
- 1 lime, juiced
- corn tortillas, warmed for serving
Directions
- In large skillet, brown lamb, onion, garlic, oregano, and 1 tsp salt. Add 1/3 cup water, chipotle chiles, and adobe sauce and stir to combine, scraping up any bits from the bottom of skillet. Cook for 2-4 minutes or until liquid evaporates and sauce clings to the lamb.
- Toss cabbage, radishes, pineapple, green onion, and cilantro in a large bowl. Add lime juice and sprinkle with 1/2 tsp salt and toss to combine.
- Spoon meat onto warm tortillas and top with a generous heap of slaw. Serve with other toppings such as avacado, sour cream, queso fresco, or pickles jalepenos.
-
@ 7f21affa:57e19174
2024-10-08 14:58:08
Chef's notes
Oven at 400 degrees Fahrenheit for 20 mins
Refrigerate the dough for 2+ hours
Details
- ⏲️ Prep time: About 3-4 hours
- 🍳 Cook time: 20 mins
- 🍽️ Servings: 10
Ingredients
- 1 cup water
- 3 sticks of butter
- 2 3/4 cups of all purpose flour
- 2 tsp salt
- pinch of paprika/jalapeno powder (I use both)
- 2 tbsp oil
- 1 lb ground beef
- 1 medium diced onion
- 1 diced red/green bell pepper
- 1 cup peas
- 4 minced garlic cloves
- 1 tsp oregano
- 1 tsp salt
- 1/2 tsp paprika
- 1/2 tsp red flakes
- 1/2 tsp white pepper
- 1/2 tsp cumin
- 1/2 cup beef broth
- 2 tbsp tomato paste
- 1 diced white/russet potato
- 3 tbsp scallions
- 1 cup shredded cheese (mexican, fiesta, or cheddar)
- 1 egg
- 3 tbsp water
Directions
- In a pot, heat up 1 cup water with 3 sticks of butter (1 1/2 cups butter)
- In a bowl, add 2 3/4 cup all purpose flour, 2 tsp salt, & pinch of paprika/jalapeno powder.
- Once butter is melted in the pot, cool & transfer to the bowl.
- Mix then wrap dough in plastic.
- Refrigerate wrapped dough for 2+ hour till hardened.
- Heat up large pot on medium heat, then add 2 tbsp oil.
- Saute 1 lb ground beef
- Leaving the beef juice, then scoop up cooked beef into metal bowl for later
- Using the beef juice, saute diced yellow onion, diced bell pepper, 1 cup peas, 4 minced garlic cloves, 1 tsp oregano, 1 tsp salt, 1/2 tsp paprika, 1/2 tsp redflakes, 1/2 tsp white pepper & 1/2 tsp cumin
- Add 1/2 cup beef broth, 2 tbsp tomato paste
- Add the cooked beef & diced potato
- Lastly combine 3 tbsp scallions
- Turn on oven at 400 degrees Fahrenheit
- Once dough in fridge has hardened, take out
- Grab a golf ball sized piece of dough and start flattening with your hands
- Dough should be around 5-6 diameter circle
- Put about 2 tbsp of beef filling you made earlier & sprinkle with a little cheese
- Crimp edges with fork
- Brush the empanadas with egg wash (1 egg + 3 tbsp water mix) before putting in oven
- Bake for 20 mins & enjoy!
-
@ af9c48b7:a3f7aaf4
2024-10-07 17:05:37
Chef's notes
This recipe originates from Meat Church BBQ. It's simple to make and tastes great if you like spicy food. While this recipe is for chicken, I feel that it would be just as good on skirt steak or other poultry.
Details
- ⏲️ Prep time: 25 minutes
- 🍳 Cook time: 20 minutes
- 🍽️ Servings: 8-10
Ingredients
- 8-10 Chicken Thighs ( Boneless Skinless)
- 26 oz Can Pickled Jalapeno Peppers (La Costena Brand Whole Jalapenos Recommended)
- 1 Stick Unsalted Butter
- 8oz Bottle Cholula Hot Sauce
- Fajita Seasoning (Meat Church Dai De La Fajita Seasoning Recommended)
- 8 Slices of Cheese (Cheddar, Pepper Jack, Whatever You Like... recommend Colby PepperJack)
Directions
- Combine boneless skinless chicken thighs in a ziplock back with the entire can of pickled jalapeno peppers. Marinate for up to 24 hours based on desired spicyness.
- Once marinate time has ended, remove chicken thighs and pat dry. Season both sides of chicken with the fajita seasoning and allow 15 minutes to adhere. Save the jalapeno peppers for grilling.
- While the meat rests, melt one stick of unsalted butter and mix with the 8oz of Cholula Hot Sauce.
- Cook the chicken on a hot grill, turning and basting the chicken regularly. This will insure a good char and ensure they chicken cooks evenly. Cook the chicken until the internal tempurature reaches 165.
- Place cheese over each piece of chicken and melt thoroughly. Remove chicken and grilled jalapenos from the grill.
- This dish pairs well with a toasted bun and mayo if desired, or as a stand alone main dish.
-
@ 6ff0b3a6:ca85496b
2024-10-03 02:09:04
Chef's notes
Carnivore or ketogenic diet need the right protein at home and anywhere: this grass fed and finished beef chips are dry and easy to enjoy anywhere
Details
- ⏲️ Prep time: 10 minutes
- 🍳 Cook time: 6 to 7 hours
Ingredients
- Grass fed and finished hotpot/veneer/sluces 1 to 1.5mm thick
- For dry meat use Bnis round slices for hotpot and with more fat use brisket slices
Directions
- Dry heat as long as possible as low temperature as possible
- I dry for 6-7 hours @55 deg cel =130 deg F.
- At the same time you can also prepare your carpaccio plate and let them freeze in the freezer or on the fridge as you prefer…
- After 7 hours, place into glass recipient or surround airy food grade rope to make a unit and store on the fridge
- Salt can be added before the drying or after
-
@ de75eb1d:710c3014
2024-10-02 15:31:57
Chef's notes
A tangy, crunchy mustard pickle for cheese sandwiches that can be made with a range of seasonal veg - especially good for preserving homegrown 'wonky' produce as everything gets chopped small and hidden in the bright yellow sauce!
Details
- ⏲️ Prep time: 20 mins + overnight
- 🍳 Cook time: 20 mins
- 🍽️ Servings: Makes approx 2kg (x7 280g jars)
Ingredients
- 500g Cauliflower
- 150g Onion
- 1kg Mixed Vegetables (such as green beans, carrot, courgette, beetroot, radish)
- 750ml White Vinegar
- 1tbsp Mustard Seeds
- 50g Mustard Powder (or 200g Jar English Mustard)
- 1tbsp Turmeric Powder
- 200g Sugar or Honey
- 2tbsp Cornflour
- 1/2tbsp Crushed Dried Chilli (optional)
Directions
- Dice all the vegetables into small bite sized pieces, cover with the salt and leave overnight
- Rinse thoroughly to remove the salt and gently squeeze out as much water as possible
- To make the sauce mix all the other ingredients with a small amount of vinegar, stir into the vegetables then top-up with the rest of the vinegar
- Briefly cook the mixture until the vegetables are just soft, approx 20 mins
- Transfer whilst hot into sterilised jars, leave to mature for 6 weeks before opening
-
@ 3eab247c:1d80aeed
2024-10-02 08:58:39
Merchant Comments
I extracted about 900 valuable comments from our verification reports and I exposed them via BTC Map sync API. Comments turned out to be extremely valuable since they often add important context to certain Bitcoin merchants. The next steps are client app support and automating new comments.
Feed Reader Support
Some people are only interested in new places or comments in their areas, so they don’t want to install our apps and check them all the time. BTC Map data is open, and we never intended to lock users in, that’s why I created a few experimental Atom data feeds. Let’s say you want to get notified of new places and comments in the Netherlands, so now you can just add the following feeds to your feed reader of choice:
https://api.btcmap.org/feeds/new-places/nl
https://api.btcmap.org/feeds/new-comments/nl
Of course, you can mix and match any number of BTC Map areas, communities and countries alike. Web feed links are always available on our website, in area activity section.
RPC Interface
Most of our administrative tasks are now centralized, which means that processing new change requests might take a long time, depending on how busy we are. This model can’t scale, that’s why we’re building an admin API, alongside GUI and CLI tools which can be used to simplify access to many local administrative tasks. There is no ETA on that, but I think we’ll be able to delegate most tasks to local community managers pretty soon.
Trending Countries
- Netherlands - 190 events and comments
- Italy - 173 events and comments
- Germany - 169 events and comments
- Spain - 101 events and comments
- Portugal - 98 events and comments
- El Salvador - 95 events and comments
- United Kingdom - 83 events and comments
- Brazil - 78 events and comments
- Switzerland - 77 events and comments
- Czechia - 74 events and comments
Many merchants in the Netherlands were re-verified by Comino, which shows that a single maintainer can keep the whole country up to date. Having a single maintainer per country would allow us to keep the whole world up to date, so if your country has some old and outdated merchants, we need your help!
Italian re-verification effort can mostly be attributed to mpbin. This user not only re-verified many existing places but also added some missing general tags such as contact details and so on. Those tags are extremely valuable, so even if your area is up-to-date, you might want to check if you have enough contact details for every merchant. This account apparently belongs to Bitcoin Italia Network, and it looks like they’re taking ownership over the whole region.
Germany’s data was enhanced by many different accounts, but 65% of German locations are still outdated, so this country needs more love from local editors. Spain continues to be in a good shape, thanks to descubrebitcoin efforts, and Portugal data quality continues to improve, thanks to Sxajne.
Big thanks to Rockedf for contributing to almost every region!
Trending Communities
- Satoshi Spritz - 176 events and comments
- Einundzwanzig Deutschlan - 169 events and comments
- Einundzwanzig Portugal - 98 events and comments
- Einundzwanzig Schweiz - 78 events and comments
- Bitcoin Association Switzerland - 77 events and comments
- Dezentralschweiz - 77 events and comments
- Bitcoin Berlin - El Salvador - 60 events and comments
- Free Madeira - 51 events and comments
- Berlin 2140 - 48 events and comments
- Einundzwanzig Berlin - 48 events and comments
Global Metrics
The number of verified merchants has dropped from 6,867 to 6,734 (-2%), which means that we’re struggling to keep more than 5-7 thousands of places up-to-date, and we need more contributors who can re-verify outdated merchants.
The total number of merchants has increased from 11,685 to 11,833 (+1.3%), which is in line with our long-term trend. The stream of new merchants has no signs of tapering, we’re just struggling to maintain the old ones in certain regions.
The average number of days since the last verification has increased from 323 to 340 (+5.3%), which means that our data is now significantly less reliable than it was a month ago. This is yet another confirmation that our main bottleneck is the lack of local maintainers.
Conclusion
Our main issue is growing number of outdated locations, and getting more maintainers can take some time. It’s not the only way to improve BTC Map though, so we can focus on highlighting the best quality merchants, which I’m intending to be busy with during October. I have a few ideas on using different quality signals, and it might make sense to simply mark or hide outdated or unreliable merchants.
The best way to help us is to re-verify some outdated locations in your area, if you have any:
-
@ c69b71dc:426ba763
2024-09-28 16:22:05
Chef's notes
This soup is a beautiful combination of simplicity, flavor, and nourishment. Quick to make, it delivers a fresh, slightly sweet taste that’s rich in nutrients. I've added avocado oil, pine nuts, sprouted buckwheat and millet, and a few herbs for the decoration. Feel free to experiment with different herbs, sprouts, seeds etc. making it a delightful and wholesome dish 💚
Details
- ⏲️ Prep time: 5 min.
- 🍳 Cook time: 0
- 🍽️ Servings: 2
Ingredients
- 1 cup raw fennel (medium-sized) cut into peaces
- 1 small-medium apple cut into pieces
- 1 cup water, kefir, or rejuvelac
- 1 tbsp nutritional yeast
- 1 tbsp (preferable raw) almond butter
- 1/2 tsp salt or herbal salt
- 1 tbsp Nama Tamari
- 1 tbsp avocado oil (or sesame seed oil)
- 1 pinch of nutmeg (about a knife’s tip)
Directions
- Add all ingredients to a blender: fennel, apple, water (or kefir/rejuvelac), nutritional yeast, almond butter, salt, Nama Tamari, avocado oil, and nutmeg.
- Blend until smooth and creamy.
- Pour into two bowls and garnish with pine nuts, sprouted buckwheat, sprouted brown millet or any other sprouts, and fresh herbs as desired.
-
@ 01d0bbf9:91130d4c
2024-09-26 17:58:10
Chef's notes
Amazingly tangy, firey hot, but still mellow and bright.
I use this on everything– Use it to dress salads, dip (honey mustard) for fried chicken, elevate your taco nights, heck a spoonful first thing in the morning will wake you up better than coffee!
Don't forget to use up those delicious chilis and garlic, they are so good!
Details
- ⏲️ Prep time: 20 min
- 🍳 Cook time: 1-2 weeks
- 🍽️ Servings: (12x) 8oz jars
Ingredients
- 16oz fresh chili peppers
- 8oz red onion
- 8oz garlic
- 96oz honey
- Fresh thyme
Directions
- Thinly slice peppers, garlic, shallots and fresh thyme
- Add chopped ingredients to the honey
- Leave to ferment (loosely covered) for 1-2 weeks
- Drizzle that amazing pungent firey gold liquid over EVERYTHING. (Don't forget to use up those amazing chilis and garlic too.)
-
@ f2e2c80b:1b1b0af9
2024-09-26 15:22:24
Ingredients
- .
Directions
- .
-
@ f2e2c80b:1b1b0af9
2024-09-26 15:11:24
Details
- ⏲️ Prep time: 10 min (+24h to lievitate)
- 🍳 Cook time: 15
Ingredients
- Toppings:
- Tomato sauce
- Mozzarella fiordilatte
- BIGA
- 200g type 1 flour
- 2g fresh yeast
- 120g water at room temperature
- DOUGH
- 5g fresh yeast
- 5g malt (or honey)
- 50g type 1 flour
- 55g water
- 15g salt
Directions
-
- Place the biga with: 5g fresh yeast, 5g malt or honey, 50g type 1 flour and 35g water in the mixer and start kneading at first speed.
-
- Add 15g salt and 20g water.
-
- Place on the counter, food and knee for 20 minutes, then shape and leave rinse at room temp. for 1.30 h.
-
- When ready shape the pizza and spread tomato sauce.
-
- Put in hot oven at 280° for 10min.
-
- Take out, add mozzarella and bake again for 5 min.
-
@ f2e2c80b:1b1b0af9
2024-09-26 15:01:08
Details
- ⏲️ Prep time: 10 min (+24h to lievitate)
- 🍳 Cook time: 15
Ingredients
- 200g type 1 flour
- 2g fresh yeast
- 120g water at room temperature
- .
- 5g fresh yeast
- 5g malt (or honey)
- 50d type 1 flour
- 55g water
- 15g salt
- Toppings:
- Tomato sauce
- Mozzarella fiordilatte
Directions
-
- Place the biga with: 5g fresh yeast, 5g malt or honey, 50g type 1 flour and 35g water in the mixer and start kneading at first speed.
-
- Add 15g salt and 20g water.
-
- Place on the counter, food and knee for 20 minutes, then shape and leave rinse at room temp. for 1.30 h.
-
- When ready shape the pizza and spread tomato sauce.
-
- Put in hot oven at 280° for 10min.
-
- Take out, add mozzarella and bake again for 5 min.
-
@ 44dc1c2d:31c74f0b
2024-09-25 20:15:13
Chef's notes
Last time I made this I subbed the tomato puréed with some blistered cherry tomatoes. Don't think I'll be using the purée going forward.
I prefer thighs so that's what I use for this but use whatever you want.
Adjust spices based on the size of your onions. If all you have is two massive onions maybe use one and a half onion or just up the amount of spices a little.
Details
- ⏲️ Prep time: ~10 min
- 🍳 Cook time: ~40 ish min
- 🍽️ Servings: 4
Ingredients
- 2 Onions
- 2 tbsp tomato purée
- 1/3 cup cashews
- 1.5 tsp Garam Masala
- 2 ish cloves of crushed garlic
- 1 tsp chili powder
- 1 tbsp lemon juice
- 1/4 tsb ground turmeric
- 1 tsb salt
- 1 tbsp plain yogurt
- 2 tbsp of your cooking oil or fat
- 1 tbsp Coriander (Cilantro) plus extra for garnish
- 1 tbsp sultanas (golden raisins)
- 1 lb of chicken cubed
- 6 oz of white button mushrooms
Directions
- Quarter the onions and put them in a food possessor for about a minute
- Add the tomatoes, nuts, garlic, Garam masala, chili powder, lemon juice, turmeric, salt, yogurt and blend for another minute tell its well mixed in.
- In a wok or a large pan heat your cooking oil and add the onion and spice mix in. Fry gently for around 2-ish minutes, stir frequently.
- Add the chicken, coriander, and raisins to the pan. Stir-fry for another minute or so.
- Add mushrooms and water. Bring to simmer and cover the pan cook for 10 min or until the chicken is 100% cooked through.
- Serve with plain rice and enjoy!
-
@ 9fc6b5fc:5bacb10a
2024-09-18 03:54:39
Details
- ⏲️ Prep time: 45 minutes
- 🍳 Cook time: 40 minutes
- 🍽️ Servings: 4-6
Ingredients
- 1 frozen puff pastry sheet, thawed
- 2 red organic apples (skin color adds great visual pop)
- Juce of half a lemon
- 1 tablespoon of flour, to sprinkle the counter
- 3 tablespoons of apricot preserve
- Cinnamon (optional)
- Powdered sugar for decorating (optional)
Directions
-
- Thaw the puff pastry if you haven't done so yet. It should take about 20-30 minutes.
-
- Prepare a bowl with some water and the lemon juice. Cut the apples in half, remove the core and cut the apples in paper thin slices. Leave the peel so it will give the red color to your roses.
-
- Right away, place the sliced apples in the bowl with lemon and water, so that they won't change color.
-
- Microwave the apples in the bowl, for about 3 minutes, to make them slightly softer. If you prefer, you can also simmer the apple slices in the water in a small pan on the stove.
-
- Unwrap the puff pastry over a clean and lightly floured counter. Using a rolling pin stretch the dough a little, trying to keep it in a rectangular shape. Cut the dough in 6 strips. These are about 2 in x 9 in (5 cm x 22 cm).
-
- In a bowl, place three tablespoons of apricot preserve with two tablespoons of water. Microwave for about one minute, so that the preserve will be easier to spread. Spread the preserve on the dough.
-
- Preheat the oven to 375 degrees F (190 degrees C). Drain the apples.
-
- Place the apples on the dough so that the skin side is facing away from you, and the bottom of the slice is at the middle of the dough (see cover image). Sprinkle with cinnamon if you'd like.
-
- Fold up the bottom part of the dough over the apple slices, so that it cups them.
-
- Carefully roll, seal the edge, and place in a silicone muffin cup. No need to grease the muffin mold if it's silicone. Otherwise, make sure to grease it.
-
- Do the same for all 6 roses. Bake at 375 degrees F (190 degrees C) for about 40-45 minutes, until fully cooked. If using a convection oven, check the roses after 20 minutes and cover if the apple slices are already sufficiently browned. Convection ovens dry out the apples more quickly and will result in 10 minutes shorter cooking time.
-
@ 30b99916:3cc6e3fe
2024-09-16 16:54:15
Chef's notes
Recipe from my Dad who frequently used the term, UBETCHA.
Details
- ⏲️ Prep time: 10 minutes
- 🍳 Cook time: 30 minutes
- 🍽️ Servings: 5
Ingredients
- 1 Quart/Pint medium sized Oysters
- 1 to 2 packs of regular saltine crackers
- 3 to 4 eggs beaten in a bowl
Directions
- Rinse Oysters thoroughly in cold water
- In a gallon zip lock bag crush saltine crackers as fine as possible. I use a roller pin.
- Place a portion of the crushed crackers into a bowl.
- In a frying pan with cooking oil turned to medium.
- Place rinsed oysters into the egg bowl.
- Bread each egg soaked oyster in the crushed cracker bowl and place into the frying pan on medium heat.
- Cook until each oyster is golden brown on each side.
-
@ 17538dc2:71ed77c4
2024-09-16 15:26:32

Quiztime
Oil and gas
Oil and gas is naturally occurring. The prevalent worldview is that oil & gas has a biotic origin. There are real world examples of abiotic oil deposits, which proponents of the status quo have a difficult time reconciling.
Irregardless, when oil & gas is burned, it simply turns to plant food (carbon dioxide + water).
Oil and gas greens the Earth, and increases fertilization and agricultural crop yield across the globe.

The energy density of oil and gas is only surpassed by that of nuclear power.
Energy produced by oil and gas combustion is generally on-demand, reliable, economically storable & transportable.
Solar
The sun is an abudant energy source, which keeps Earth warm, and alive. Thank you sun 🌞!
With the exception of places such as the UK, where it is unclear if inhabitants have ever seen the sun, solar rays keep plants, animals, and humans happy & alive on most of planet Earth.
Inventions such as solar panels harness the sun's energy, and convert it to electricity.
Solar panels consist of silicon, rare earth metals, and require toxic metals.
Solar panels have an expected life of decades, are not readily or economically recyclable.
A very low solar energy density practically means that land is inefficiently utilized in solar energy production. Solar used on arable land can no longer be farmed, and where no plains exist solar is known to cause deforestation and landslides.
Solar energy is not reliable, not can it be summoned on demand. Solar energy is not economically storable, and is many cases is not produced at the point of demand.
Despite central planner mandates & subsidies in the US, the #EULAG and elsewhere, due to its intermittent nature, solar power cannot be counted on to replace reliable power generation in nuclear, hydro, or carbon fuel thermoelectric plants.
What this means is that solar does not replace, and yet ratheradds to reliable energy generation, as most people in the developed world would not be OK with having electricity for at most 1/3 of the day. This increases the price of electricity, which in turn increases energy poverty, and drives businesses to shut down manufacturing, or move to a more energy competitive jurisdiction.
The capital wasted by central planners could have been used to reduce burden on consumers, and businesses, or fund healthcare, infrastructure, or other services.
It should be noted that off grid applications where there is no grid, or energy alternatives can be massively useful for folks otherwise without electricity.
Which energy source would you consider renewable?
-
@ c69b71dc:426ba763
2024-09-16 08:21:02
Chef's notes
This granola is a wholesome, nutrient-dense option that's free from sugar, oil, and artificial additives. The activated nuts and seeds are sprouted to enhance their nutritional value and digestibility, while the natural sweetness comes from apples and bananas. Dehydrating at low temperatures ensures the ingredients retain their raw, living enzymes. Enjoy this crunchy delight as a breakfast topping, snack, or straight from the jar!
The picture shows my delightful breakfast: creamy oat milk with chia seeds, topped with crunchy granola and fresh cubes of apple and pear 💚
Enjoy your crunchy, nutrient-packed granola⚡️
Details
- ⏲️ Prep time: 10 min (soaking 24 hours)
- 🍳 Cook time: 16 hours (Dehydration)
- 🍽️ Servings: 6
Ingredients
- 1 cup raw almonds
- 1 cup raw sunflower seeds
- 1 cup raw pumpkin seeds
- 1/2 cup raw cashew or walnuts
- 2 ripe banana
- 1 apple (cored)
- 1 tsp pure vanilla extract
- 1 tbsp raw cocoa powder
- 1/2 tsp ground cinnamon (optional)
- Pinch of sea salt
Directions
- Activate and Sprout the Nuts & Seeds: Soak the almonds, sunflower seeds, pumpkin seeds, and cashews or walnuts in water for 24 hours. Drain and rinse thoroughly.
- Prepare the Fruit Mixture: In a blender, puree the banana and apple until smooth. Add the vanilla extract, cocoa powder, cinnamon (optional), and a pinch of sea salt to the puree.
- Mix and Combine: In a large mixing bowl, combine the activated nuts and seeds with the fruit puree. Stir well until everything is evenly coated.
- Dehydrate: Spread the mixture evenly on dehydrator trays. I use silicone sheets with a border. Dehydrate at a temperature at 42°C (115°F) for 12–16 hours, or until the granola is completely dry and crispy. If you don’t have a dehydrator, you can use your oven at its lowest setting, leaving the door slightly open.
- Break Apart & Store: Once fully dehydrated, break the granola into chunks. Store in an airtight container in a cool, dry place for up to 2 weeks.
- Serving Suggestions: Sprinkle on top of smoothie bowls, or eat as is!
-
@ ffd375eb:4529ed08
2024-09-15 18:08:27
Chef's notes
The ginger, lemon, and spicy peppers are optional ingredients that can be added to enhance the flavour and potential health benefits of the fermented garlic honey.
Details
- ⏲️ Prep time: 20 minutes
- 🍳 Cook time: 1 month (or longer)
Ingredients
- Garlic cloves, peeled and cracked open (if possible)
- Local, unfiltered honey
- Ginger root, peeled and cut into 1/8 to 1/4 inch pieces (optional)
- Lemon, cut into small pieces (optional)
- Spicy peppers like bird's eye peppers (optional)
Directions
- Peel and crack open the garlic cloves. The cracked cloves will ferment faster.
- Add the peeled and cracked garlic cloves to a clean jar, filling about half the jar.
- Add the honey to the jar, leaving about 1 inch of headspace at the top.
- If using, add the ginger, lemon, and/or spicy peppers to the jar.
- Seal the jar tightly and shake well to combine the ingredients.
- Burp the jar (open it to release built-up gas) and gently shake it once or twice a day for the next 1-2 weeks to allow the fermentation process to occur.
- After 1-2 weeks, refrigerate the fermented garlic honey. Continue to burp the jar once or twice a week.
- Use the fermented garlic honey within 2-3 months for best quality and safety.
-
@ d7c93c62:467bcf85
2024-09-10 04:07:40
Chef's notes
This recipe is will need to be broken down into 3 parts. 1 Growing a scobe. 2 Your first fermentation. 3 Your second fermentation.
The length of time that your kumbucha will need to ferment is going to be determined in part by the ambient temperature in the room where you are fermenting. A simple taste test starting with day 3 and proceeding 1 a day for each consecutive day, will help you see the change in flavor for your particular temperature and scoby. My personal ferments are typically done in 3 days.
Details
- ⏲️ Prep time: 15 minutes
- 🍽️ Servings: 16
Ingredients
- 4 cups boiling water
- 8 cups room temp water
- 2-3 tbsp. Loose-leaf black tea.(your choice which)
- 3/4 cup raw organic cane sugar
- 1 scoby
Directions
- Boil 4 cups of water and place your 2-3 tbsp of loose-leaf black tea and let steep for about 15 minutes. Strain out the tea leaves. Then add the 3/4 cup of sugar and stir till disolved. Do not use other types of sweeteners, you may kill the scoby. After the sugar is disolved add in the other 8 cups of room temperature water, which will bring down the temperature of the tea mixture. Your tea should be under 80f before you add your scoby. Poor this tea mixture into a 1 gallon glass jar, do not use plastic.
- Add in your scoby and then cover your jar with a clean cloth or I like to put a coffee filter on the top of my jar with a rubber band to keep out any bugs or what not. Put the jar in a shady spot and let it sit for 3 days before testing. You can begin drinking it when the flavor is to your liking after the 3 day period.
-
@ b7274d28:c99628cb
2024-09-10 03:52:43
Chef's notes
Inspiration for this recipe struck me while preparing a traditional PB&J sandwich and my daughter was also preparing herself a grilled cheese sandwich. I saw the sliced cheddar cheese laying out and thought, "Why not?" Everything should be tried once, right? Lo and behold, it was more tasty than I expected!
Optional Modifications: Consider trying this recipe with toasted bread, crunchy peanut-butter, an alternative flavor of jelly, or even pickles or jalapenos if you are the particularly adventurous type.
Details
- ⏲️ Prep time: 5-10 min
- 🍳 Cook time: NA
- 🍽️ Servings: 1-2
Ingredients
- Sliced Wheat Bread x2
- Sliced Cheddar Cheese (Enough to cover the area of a slice of bread.)
- Creamy Peanut-Butter (approx. 2 tbsp)
- Strawberry Jelly (approx. 2 tbsp)
Directions
- Locate the ingredients and arrange them on the kitchen counter. (Dads: The jelly is probably buried behind everything in the fridge.)
- If your cheddar cheese didn't come pre-sliced, carefully slice enough 1/8" slices to cover the area of a slice of bread.
- Spread the peanut butter evenly onto one of the slices of bread. (Note: DO NOT lick the butter-knife... yet.)
- Spread the jelly as evenly as you can on the other slice of bread. (NOW you can lick the knife.)
- Place the sliced cheddar cheese onto the slice of bread with the peanut-butter, covering the area without overlapping the cheese slices.
- Flip the slice of bread with the jelly onto the slice with the peanut-butter and cheese, jelly-side-down, forming the sandwich.
- Enjoy!
-
@ 44dc1c2d:31c74f0b
2024-09-09 01:55:24
Chef's notes
Makes an excellent Chicken sandwich.
Details
- ⏲️ Prep time: 6 Ish hours
- 🍳 Cook time: 40 min
- 🍽️ Servings: 1 loaf
Ingredients
- 3 ½ - 4 cups bread flour, or more as needed
- 1 ⅓ cups warm milk (110°F – 115°F)
- 5 tablespoons honey
- 4 tablespoons salted butter, melted and slightly cooled
- 1 tablespoon instant “rapid rise” yeast
- 1 ½ teaspoons salt
- Oil or butter for greasing the bowl
- 1 tablespoon melted salted butter, for brushing the crust at the end
Directions
- To prepare the dough, weigh the flour or measure it by gently spooning it into a cup, then leveling off any excess. In a large bowl, combine the flour with the warm milk, honey, melted butter, instant yeast, and salt. Mix by hand or with the paddle attachment of a stand mixer until a shaggy dough forms, gradually adding more flour, as necessary, to get the dough to come together so that it just pulls away from the sides of the bowl.
- Switch to the dough hook attachment (or use your hands) to knead the dough until fairly smooth, about 7-8 minutes.
- Oil a large mixing bowl. Place the dough in the greased bowl, turning once to grease the top. Cover and let rise in a warm place until doubled, 1 ½ - 2 hours.
- Punch down the dough. Transfer to a lightly floured work surface. Pat the dough into a 9 x 12-inch rectangle. Starting on one of the short sides, roll up the dough to make a log; pinch the seams. Place the dough seam-side down in a lightly greased 9 x 5-inch loaf pan.
- Cover the pan with lightly greased plastic wrap; allow to rise for 1-2 hours, until it’s crowned about 1-2 inches over the rim of the pan. Towards the end of the rising time, preheat the oven to 350°F.
- Bake the bread for 40-45 minutes, tenting the top of the bread loosely with foil towards the end if the top starts to get too brown. The bread should be golden brown, and it should sound hollow when tapped.
- Brush the top of the warm bread with melted butter.
- Remove from the pan and cool on a wire rack for at least 1 hour before slicing.